Put Frog in your party for this quest. West of Fiona's Villa/south of the Sun Keep is Choras. Enter the Cafe and... hey Toma! (*Note: you can only do
this quest if you paid for his drinks when I told you to). Talk to him and he gives you Toma's Pop. He tells you to pour it on his grave if he doesn't
return. Also, talk to the guy living it up with beer at the table. Now, go to 1000 AD and enter the Cathedral/Northern Ruins (to the north, duh :op ).
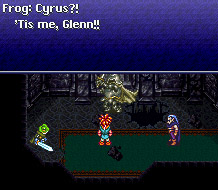
Go left. Ack! It's a dead guy! (... well, that was repetitive...). Talk to it... and attack? After a couple of rounds of nothing working (don't bother
wasting your MP, as magic doesn't work, either), Frog speaks, and then... semi-recognition from Mr. Ghost-Man, who is indeed Cyrus. Well, whatever. Leave,
and go to the Choras Inn. Talk to the soda pop-lovin guy there that looks like the beer-lovin guy from the past. He'll let you borrow his tools. Exit,
and go to what seems to be the only house in Choras (so where do all those other people live? The bar? ^O__o^;; ). Talk to psycho-lady-who-looks-like-Crono's-mom
to get the guy's tools. To the left of that is West Cape, where Toma (who's obviously now dead) is buried. Inspect the headstone, and... oh joy, more dead
guys. Huh? That looks like the Sun Keep. But apparently isn't... ah well. Aw... Toma goes bye-bye... *sniff* Well, if you want the rest of that sidequest,
click on "The Colours, How They Sparkle" below. Now, onwards! ... or backwards? Whatever, go to 600 AD.
Return to the Cafe and talk to Beer-Boy again. Answer yes, and go to the Residence. Talk to the dude again, and he goes off with his trainees to fix the
Northern Ruins. Go there, and he'll say they're done for now. Now you've gotta go through and beat up the monsters, so these guys can come back and fix
more holes (which opens up new areas).
Go left and downstairs first. Only magic works here, so use that on the Sentries. Go right to fight another pair of them, get the HyperEther out of the
chest, then go back to the previous floor (man, I hate MP Buster...). Go right this time, up the stairs, through the door, and right to battle some more
dead stuff. Ergh. Do the same on the left side of the room, and the back. Magus' Shadow spells do not work on anything skeleton-like, just so you know.
Don't bother going through the door, cause there's a big hole there anyway. Go back to the Residence... and now he wants you to pay him?! Ah well, go ahead.
2000g. ^-__-^;; Back to the Northern Ruins to destroy some more dead things. Left again, and go through the door you couldn't go through before. Inspect
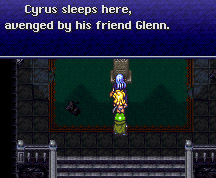
the gravestone. ... heh. It always amuses me to have Magus in my party for this. :op And now... Masa and Mune appear! Hee. "Mucho metaphysical, man."
The Masamune is powered up! Woo! Check the headstone, and now it's different. D'awww.
OK! Now to finish the rest of this sidequest. Go back to the house, and pay another 2000g. Merg. Well, you'll thank me later. Back to the ruins
(actually, if you'll notice, it's now called Hero's Grave ^~__~^ ). ... apparently, they're done, but there're still holes in the floor? Man, these guys
really suck at their job.... :op OK! Back upstairs! In the right room is another of those boxes. Same deal here as before, though. Inspect it and answer
No. In the left room is an Elixir. Go to the room in the back, fight off the baddies, and continue back. Do the same with the boxes here, then leave.
In 1000 AD, you can now get a Moon Armor instead of a Nova Armor, a Valkerye instead of a Siren, and a Shiva Edge instead of a Kali Blade (yes, this is better
than the Swallow, if you picked that in the forest instead of the Safe Helm). There's also a Magic Tab near Cyrus' headstone. You can also get the previous
items just like you could get the Vests from the other boxes if you go back to 600 AD now... plus, you have to go there anyway. Head to the Denadoro
Mountains. Go to the part where there's a Freelancer throwing rocks at you, then go up to where there's an opened chest, and go left. Stand right in front
of the FreeLancer, put Frog in the lead, and Frog will catch one of the rocks. It's the Gold Rock (for Frog, Marle, and Robo's triple tech, Grand Dream)!
Now leave, cause that stupid thing's still throwing rocks... After that, you're done!
[Fiona and the Sandpit] | [The Mystics, Revisited] | [Mother and the Brain] |
[It's a Rock!] | [The Colours, How They Sparkle]
[The King and I] | [You Know, That Big Black Thing is Kinda Annoying] |
[Giant Porcupine of DOOM]
The Beginning
Of Frogs and Queens and Mutant Hamsters
Back to Life, Back to Reality
For Future Reference
The End of Time and Other People's Closets
The Hero and the Masamune
Blast to the Past
Dance with Death
The Crimson Flame
The Magic Kingdom
Break the Seal
Golems and Jail
Rebirth at Death Peak