OK, you know the drill guys. Primaries leading to missions that are mission splits will be the first paragraph in their respective missions. So, for Koss' quest and mission (Heart or Mind: Garden
in Danger) skip down to the Jennur's Horde section. For Melonni's quest and mission (Heart or Mind: Ronjok in Danger) skip down to the Nundu Bay section. And again, you can actually do both from
the get-go but you only need to do one of the two in order to advance the storyline. Oh and remember that I told you you ought to have r4 Lightbringer by now, so if you don't go rampage around
in the Nightfallen Garden (where you'd be going for Koss' primary) til you get it. On another note, we're gonna need the Jennur's Horde outpost later anyway so you might want to go ahead and at
least do both primaries (plus, they give LB points as rewards). Oh, and one more thing: In Melonni's primary you will fight a new class of demons. They are affected by the LB title and skills
in the same way as the Margos, but they look different and have different skills. In the later part of the game you will be dealing with these guys a lot so even if you're not doing Melonni's
primary you'll want to read the description of these demons and what they do cause you'll need that info later.


Required Hero: Koss, the Turquoise Zebra
(In case you didn't get the nickname, one of Koss' special armour sets has a turquoise zebra pattern to it for whatever reason) Anyway. Primary time. Make sure Koss is in your party, map to
Tihark, go out the west exit, and go through the portal that's like two feet in front of you. Go a short distance north to find the Hedge Wizard (the hell is a hedge wizard anyway). What? We're
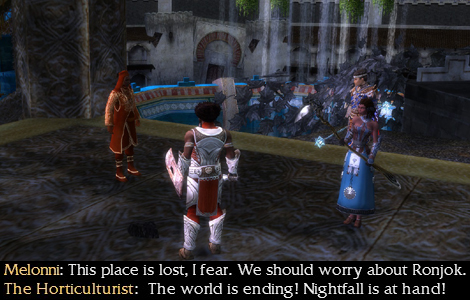
asking KOSS to talk sense into someone? ... WELL. That was the shortest primary in the history of the universe. ^<__<^;; Melonhead's like, "whelp, this place is fucked, let's leave." However,
the garden hasn't been completely corrupted, so I guess it's up to us to stop it. After the cinematic find Master Gardener Kobahl by the henchies to get your quest reward.
OK, here's the deal with this mission. As the intro text informs you, only the Light of Seborhin can harm the Harbingers. What is this light thingy? Well, it's right next to Horticulturist Hinon,
who's in front of this giant fountain right in front of you. By the way, if this guy dies it's game over so this is going to involve a lot of running around like a bloody lunatic. Just
so you know~ The danger won't start til you aggro something so if you need a minute to prepare buffs and drop spirits and whatnot go ahead. Oh, by the way, despite the wording of the intro text,
this mission is not timed. There's no timer, there's no bar in the corner of the screen, nothing. You can take five days on this mission if you want and the garden will still not be destroyed
(well, unless you allow Hinon to die anyway :op ) Once you're ready, pick up the Light and head left around
the fountain and go straight towards the back to find the first Harbinger. Dropping the Light right next to it will literally one-shot it so do so. Each time you kill a Harbinger a Spirit of
Seborhin appears nearby and will make a new Light for you so you don't have to backtrack to Hinon each time. These Spirits can die, but the only downside to this is that they won't make new Lights
for you anymore if they are dead; it doesn't mean game over. Hinon is the only thing you can't allow to die in this mission. And yes, both Hinon and the Spirits will make a new Light if you take one
specifically from them and then use it (they will make another one shortly after), and the Spirits will also make one immediately after they appear. Sooooooooooooooooooo, grab the Light from the
newly-appeared Spirit and keep heading east. At this point groups of margos start heading towards Hinon one group at a time. There's a decent amount of time between each group but you're going
to want to keep an eye out once you head up the stairs that we'll get to in a minute. If you're slow, you should see the first group of margos already heading your way. Take them out then continue
on to the next Harbinger, one-shot him, then grab a Light from your newly-spawned friend and continue east again. There's a stationary mob at the base of the stairs. Take them out quickly and
wait for the next (or first if you've been fast enough) group of running margos to come down the stairs. Kill them then climb the stairs and destroy the next Harbinger just up the stairs. The
next Spirit appears just south of your current position. Just an fyi, the running mobs come from waaaaay far back to the east but there's a big old hole in the ground which causes some of the mobs
to come from the NE and some from the SE so you want to keep an eye on your compass. From here, take out the stationary mob on the left then backtrack to your newest Spirit friend and wait for
the running margos to come to you (if you're really going fast you might have to wait for a minute or two but it's better than letting them slip by you and murder Hinon), then take out the
stationary mob to the south. Now take out the two nearby Harbingers (one to the NE and one to the SE) who are on either side of the giant hole I mentioned. Here is where the bonus people and the
non-bonus people split up. If you want bonus, skip to the next paragraph. If you're not going for bonus, gather up three Lights from your nearby Spirit friends (the Lights only disappear if used
near a Harbinger so feel free to drop a few closer to where you need to fight the boss before aggroing him) and banzai to the back where the final boss awaits (not up the stairs). Unlike the other Harbingers,, the Harbinger of Nightfall will only die after three Lights are used on him
instead of one so if you have two friends with you drop all three on him. If not, park your party to keep him busy and run back to where you dropped your stockpile earlier, grab another, drop it
on him, lather rinse repeat til he's dead. Be aware that the running mobs spawn pretty much right on top of the final boss so be ready to fight whenever they spawn. You should be able to kill this thing without
aggroing the small margo groups on either side of him but they are small so it shouldn't be that much trouble. Once you drop the third Light he will go splat and the mission is over.
Sooooooo. Sup, bonus p33pz? We're picking up right after the two Harbingers on either side of the giant inexplicable hole. To the north and south of these Harbingers are long flights of stairs
going up. We are going to be going up them and as I said they are long so you might miss a running mob if you're not careful. You've got two options to prevent this from happening: 1) Have a
designated lookout. This guy can either just park himself by the first Spirit you freed on this level and yell out if he sees a mob coming (might be helpful if he's either an mm with a bunch of minions
following him or a spirit spammer so he won't DIE if you guys don't get to him soon enough) or 2) he can park himself at the foot of whatever stairs you guys are currently banzai'ing up and keep
an eye out from there. The third and less viable option (especially if your lookout has ADHD) is to have the lookout keep running back and forth between helping your party murder stuff and checking
for running mobs. Again, not recommended for ADHD lookouts. So, where are these running mobs coming from? Well, on the middle level (i.e., up the first flight of stairs you came up but not up the
flights of stairs for the bonus) to the east of the giant inexplicable hole is an area with a bunch of those magic carpet bridges and at the back is apparently a giant gnarly demonic tree-thing
where the final boss awaits. The running mobs literally spawn right on top of the final boss. Well anyway, pick your poison, I mean, lookout method, wait for the next running mob, take them out,
and then go up one of the flights of stairs. It will help if you pull as many of the margos from up top down the stairs as possible. Oh and btw you have to kill not only the two other Harbingers
up top but their margo friends too in order to get the bonus. Once they and the Harbinger are dead go back down the stairs and wait for the next running mob, then repeat the same process for the
other set of stairs. Now you can go back to the previous paragraph and finish the mission~
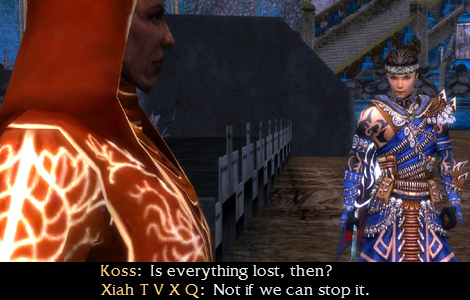
Once the mission is over, Koss is like "See, I was totally right! And Melonni is a pain in the arse." And you're like, "Well maybe you should go talk to her cause I don't like drama in my party."
And Varesh is like "Ow, my heart, my head, my FACE. But Abaddon will prevail!" Aaaand... these two branched missions are really really short and there isn't much to say about either of them. So,
we're done here. ^<__<^;;


Required Hero: Melonni, the Cranky Psychic
Soooo... primary time. Map to the Sanctuary and go out into Marga Coast. Uh. Ronjok seems fine, Melonhead. Also, Elder Jonah wants us to go away when we talk to him. Melonni wants to look
around first, so head south. When you reach the starburst, Melonhead comments on how these fields were destroyed in her dream. Well, I wouldn't call a barren, red wasteland "not destroyed" but
whatever. The next spot is straight NW of here. ... the land eating itself? That does sound like a nightmare ^O__o^;; After that, go north-ish but slow your roll, cause demons will spawn as
soon as you get close enough to Hahla and fighting them and the bug mob AND the hidden bug mob in the field can get kinda annoying. So, before we get near her let me tell you about the demons,
since you haven't really encountered these before. All of these new demons have a skill called Call to Torment. If they successfully use this skill and don't die within five seconds of using
the skill (don't be confused: the skill has a five second cast time, but then there's another additional five seconds after the cast time during which you can still kill them and avoid the skill)
they will essentially clone themselves, which can get out of hand rather quickly. This skill is not interruptable, even though the cast time is super-long, BUT they do take double dmg while casting
it so make sure you call targets when dealing with these types of demons to focus your fire and kill them quickly. Word of Madness are healers, Rain of Terror are water eles, and these two are
your priority targets. The other types that you will find in this quest are Blade of Corruption (war), Arm of Insanity (ranger), and Shadow of Fear (necro). Later on you will also encounter Herald
of Nightmares (mes), Spear of Torment (para), and Scythe of Chaos (derv). OK, when you're ready, approach the starburst from the SW so you can hopefully avoid aggroing any bugs. After the demons
are dead speak to Hahla. She says she's alright but that you need to warn Jonah as soon as possible. And yet still nothing happens. After the cinematic find Dreamer Raja near the henchies.
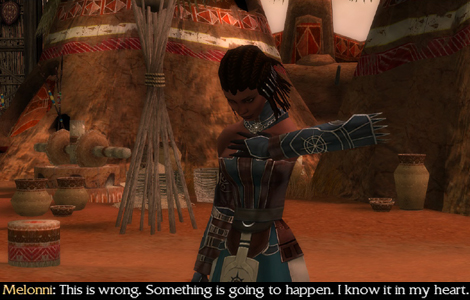
She tells you that Melonni's nightmares have the power to make the events that she saw in them actually happen in reality, so we must stop them.

OK guys, you NEED an mm for this, whether you're going for bonus or not. The first part of the mission is the only difficult part, but you're going to be attacked by multiple waves from three
sides, AND have to make sure Elder Jonah doesn't kick the bucket (or get his bucket kicked for him, as the case may be). Minions will really help pull aggro away from Jonah. Hell, you might even
want to bring two mm's; up to you. When you spawn you will be inside Ronjok. The mission won't really start til you talk to Jonah so move forward, start making minions from the corpses lying
about, and park yourself by the well between the three gates. Make any preparations you need to, then talk to Jonah and receive the Vial skill. You will need this skill to kill the bosses but
it doesn't really do anything to other non-Harbinger enemies so don't bother using it on anything that isn't a Harbinger. After you receive the skill the aforementioned waves will start showing up.
You can move towards the gates to meet them but again they come in from all three gates so don't for any reason go outside of the gates until after the waves stop showing up. Again, minions tend
to be good ways to draw aggro from other mobs while you're busy fighting one mob if you're havin trouble killing things fast enough. Once the boss shows up you can feel free to leave the gates
and engage his group. After the boss is dead, go back inside as a Harbinger starts heading to the south gate. Use the Vial on him as soon as he's in range and then kick his ass. If the hex wears off before he
dies use the Vial again. After he's dead there's a very short break, and then multiple waves with bosses in them start showing up. After you've killed 2-3 bosses another Harbinger shows up (sometimes
the third boss mob shows up after the Harbinger because they got lost on the way there I guess but they will show up eventually so keep an eye out), this time from the north gate. After he's dead
stick around for a bit cause sometimes there are other mobs that also got lost on the way here and show up late to the party. Once you've chilled out here for about a minute with no mobs showing
up, start clearing the mobs just outside the gates, just to be sure. Be aware of one thing though: If you have minions Elder Jonah tends to follow you. Sometimes this includes following you leaving
the village. You might want to wait for all of your minions to die before leaving, but if the mission has seemed pretty easy so far then your party is strong enough for Jonah following you to the
end of the mission to not be a problem, so it's a judgement call really. Anyway. From here, head out the middle gate and cross the bridge made of teeth, then continue SW into a valley made of teeth. Kill
the two mobs as you make your way SW. Now, after the second mob is dead, the bonus and non-bonus people will part ways, since the final boss is actually visible from here. Bonus people, skip to
the next paragraph. OK, here's the deal with the final boss: He keeps summoning more margos as his HP drops, but they're just regular margos so it's really not that big a deal. Just be aware that
they will be showing up. They don't spawn on top of him, but will approach from behind your party. You can actually kill him before even the first wave of support margos show up so don't even worry
about it too much. Just keep hitting him with the Vial whenever it recharges and kick his ass.
After the second mob in the Valley of Botched Dentistry, head south along the path to find a fort up ahead. Try to pull the first mob to the outside of the fort to avoid aggroing both bonus Harbingers at
once. Once they are dead, move into the fort and clear it out to get rid of the final bonus Harbinger. Now, go back to where you split from the non-bonus people and go back to the previous paragraph
to finish the mission~
Once the mission is over, Melonni is like "See, I was totally right! And Koss is a pain in the arse." And you're like, "Well maybe you should go talk to him cause I don't like drama in my party."
And Varesh is like "Ow, my heart, my head, my FACE. But Abaddon will prevail!" Aaaand... these two branched missions are really really short and there isn't much to say about either of them. So,
we're done here. ^<__<^;;


Quests: Crossing the Desolation (primary)
So, depending on which mission you did you'll get your primary from different people, but it's the same primary so we're all gonna do it together. If you did Jennur's Horde grab your primary
from Zerai the Learner in Kodash then meet the rest of us in the SS Sanctuary. If you did Nundu Bay go talk to Lonai in the SS Sanctuary, then everyone head into the Command Post and talk to
Kormir. ... honestly I don't know if anybody bothered to tell the people who didn't rescue Kormir that she got rescued but now you know~ and you've got those people who sided with Margrid to
thank. So go thank them. :P Anyway, Kormir says she's probably gonna die soon for reasons~ she also tells you to go talk to Mirza. You know, that centaur leader guy we saved way back when
and who kept sending us to fix some trees. ^<__<^;; (oh and for those wondering, Kormir is talking about how the demons ate her eyes. Hey thanks for the visual, Anet) Map to Venta and head
out into Turai's Procession.
Corsair Infestation
Those Bird-Things Aren't the Only Harpies Around Here
It's Getting Kinda Crowded In Here
And Then the Men Go Marching Out Into the Fray...
Boldly Going to Strange New Lands
On the Run
Me and What Army? CENTAUR ARMY, THAT'S WHAT
Between a Rocky Demon and a Hard Fort
Invasion of the Party Crashers
Stop Splitting the Party
Rock the Kodash