
Quests: Capturing the Signet of Capture, Drake in a Cage, A Prescription for Conscription, Feeding Frenzy, Insatiable Appetite, The Great Zehtuka, The Dejarin Estate
Well, Zhed is a required hero for this mission. Also in case you haven't noticed, Zhed joins your party at lv 17 because Anet is retarded. SO.
Time to do some of those quests I had you put off. There are also new quests available so that's useful. Make sure you actually have Zhed in your party for these though otherwise he's gonna be
17 forever. ^<__<^;; Map to the Sanctuary and go out into Marga Coast. If you're a Nightfall character, talk to Elder Jonah for the Capturing the Signet of Capture quest. OK, quick explanation
about this thing, since the Elder is rambling. Basically you can only use this thing if you put it in your skill bar (so, replacing one of your normal skills) and you can only use it on bosses.
Specifically dead bosses. Once you use it near a dead boss a list of all of that boss' skills appears and you can then click on one and the signet in your bar will be replaced by that skill. Like
the Elder said, you can only capture skills of your profession, however GuildWars allows you to have two professions and also allows you to change your secondary whenever you want (although you
have to unlock the other secondaries first. Prophecies makes you do some quests to do so but Factions and Nightfall only require you to find the profession changer guy and pay him a one-time per
profession fee of 500g to change profs, after which you can change them at will from your K menu in any town). The prof changer guys are in Senji's Corner (Factions) and in the Command Post
(there's also one in the Great Temple of Balthazar but Anet keeps changing the rules on when you're allowed to talk to that one). OK, also there are normal skills and elite skills. It's generally
not worth it to use cap sigs on non-elites, especially since you only get two freebies, after which you have to buy them from the skill trainer. And while the price for each cap sig is independent
from the price per skill, the price still goes up each time you buy one, max being 1k each, so it can get expensive after awhile. Since there are tons of bosses all over the place and I'm not
here to make you choose certain skills, I won't walk you through this quest. Just use it whenever you find a skill you'd like and after you've successfully capped a skill this way return to
Elder Jonah for your quest reward.
OK, now something everybody can do~ Yay~ NW of the Elder, still in Ronjok, is some annoying guy named Chuno. He doesn't particularly like you, but this doesn't stop him from wanting you to do
him a favour. ... maybe he's related to Zudash? Well whatever, grab his quest and return to the Sanctuary. Switch Koss into your party and map to Yohlon Haven (where we loaded after the mess
that was the Consulate Docks mission). Herbalist Makala is near storage. He tells you he needs one more thing for Koss' elixir. Use the exit to Arjok here in town (the eastern one) and talk
to Makala right in front of you, then start making your way north along the wall. When you see the portal to Marga Coast turn NE and continue along the wall going around the bend. Once you turn
the corner there will be a mob of plants ahead of you, including the Zephyr Hedger Makala wants you to kill. It's an ele boss so be prepared. Once it is dead, speak to Makala again for him to
give the elixir to your entire party. Suddenly, a tiny lv 5 heket shows up, but... aaaahhh what is thiiiiiiis what have you doooooone... clicky spell fail noise makes sad Z sad. Basically his
stupid elixir makes it so you can't use any skills or spells at all. And again, he gave it to your entire party. Apparently this guy is so thorough he even gave it to the minions... ^<__<^;;
After a bit, Makala decides he's had enough fun at your expense and gives you the antidote, after which the midget heket dies almost immediately. ^<__<^;; Get your quest reward from sneaky Dickface
Makala. *Note: Sometimes even after you accept the quest reward because Makala is a douche, so you might want to go back to the Marga Coast portal and zone back into Arjok
to get rid of it (and sometimes it only stays on some of your heroes and not others so make sure you check). Just NE of here is a lake. Go there and kill some skales til you get five
hunks of meat, then go to the west bank of the lake and inspect the drake cage there. A drake immediately appears. Hit it and it stops attacking once you get it down to about 50% HP. From here
head SE past the Whispers Informant guy I mentioned when we went to go save Koss (remember, you're gonna need these Lightbringer points his bounty gives you later on so you might wanna take a
short detour here and kill the few elementals that exist nearby (srsly, there's only like 8)). Head straight east from the LB guy, going left around the hill, and you'll soon come across another
Herbalist. Fortunately, this one isn't a dick and asks you to save the boys that the Kournans randomly drafted into their military. Well, first we have something else to do around here. Head
north from the Herbalist past a giant windmill towards the res shrine. As you approach, some NPCs start arguing about their men being taken away and how best to abuse of our existence. Talk to
Elder Isma, who says you owe them (really?) and demands that you protect their crops from bugs. Pfft, if we didn't need to level Zhed I'd tell Ugly Bitch to go screw herself. Well, pretty much
as soon as you accept the quest bugs start pouring through the nearby portal and a counter starts counting down from 5min. Best thing to do is head towards the portal and park yourself just at
the edge of the field closest to the portal. Even if minions decide to aggro mobs right at the portal just wait by the edge of the field so you don't get overrun. Fortunately if you do get
overrun we already activated the nearby res shrine so if you wipe just run back quickly. However, if you stay by the edge of the fields you should be fine. Once they are all dead (even if the
counter hasn't reached 0) the timer goes away, so get your reward from the bitchy lady. Seems she's changed her tune a little bit, but not by much. Now we get to backtrack... all the way back
to the portal to Yohlon. Yaaaaaay. ^=__=^;; Once Koss starts talking, head directly south to find the drafted kids. The Kournans will not aggro until you are literally on top of the starburst,
even if you're coming at them from behind, so that's a bit silly. Don't worry about the NPCs cause they won't die. Just kill the Kournans, then head east past a res shrine... yeah that's right,
we're hitting up the fort that Koss had been held prisoner in. There're less troops this time around, but there's still a boss. However, if we go in from this side we can almost 100% surely
avoid him (not that he's terribly difficult or anything). Go straight through the fort and cross the bridge on the other side. Past the shrine is a deceptive closed gate. There's actually a
portal just to the left of this gate, hidden from sight by the hill. Go through the portal, then map back to the Sanctuary once you've gotten Pogahn Passage on your map, as we'll need this town
in a minute.
Hand in your quest to Lonai, then go out into Marga Coast and talk to Chuno about the drake. Who... is... standing right next to him. Uh. Hi Mr. Drake. ... *shoves Chuno off a cliff* Stop
hitting on Melonhead, she has no time for your nonsense. Chuno now has another quest for you, involving feeding the new village pet. OK, this quest can be kinda annoying, especially if you're
like me and steamroll over most enemies. See, as Chuno says you have to weaken Toma's prey. Yes, WEAKEN, not KILL. And with OP parties it's kinda hard to do that so you might want to leave
some of your party members behind for this. Whatever you decide to do, Toma starts following you, so go find some things for him to eat (and yes, he does in fact eat Kournans, so do with that
info what you'd like ^<__<^;; ). He eats things when they are at about 30% HP so stop hitting things when they get around there. He needs to eat about 10 things to stop being hungry, but fyi
he can die so if he does it's quest failed so be aware of that. Once the hunger bar depletes all the way (it's on the left side of your screen, btw, in case that's where you put your hero skill
bars) return to Chuno for your reward. He has another quest for you but read this explanation first.
This quest does not give EXP but the quest reward is one of the required
items to make a green Black Moa Chick minipet, so if you're interested in making the moa chick be sure to do this quest. If you're only interested in levelling Zhed, skip this quest. The details
about making the minipet are here in case you're interested (and yeah basically you have to do that entire page and it's from the Prophecies walkthrough, and also
you need all three campaigns and the expansion in order to make the mini so if you don't fulfill those requirements just skip this quest). As soon as you take the quest, a timer begins
to count down. There will also now be mandragor popups right outside Ronjok so don't worry if you think you've killed everything nearby. There won't be a hunger bar this time, but him eating
works the same way as last time (don't kill the enemies, just get them down to 30%). He only needs to eat five for you to complete the quest. Back in the Sanctuary go out into the Jahai Bluffs
(through the Command Post, and btw you can kick Koss out now). Head west and you'll soon come across a mob of lions and one lone NPC. While these lions are aggressive, you can still tame one
if you so desire (be aware that there are males and females, and as is IRL they look different ingame too but count as the same pet). Any lion you don't tame you need to kill. Once they are all
dead or tamed, talk to the NPC, who seems to be the most delusional person I've met outside of a psych ward. Seems he's also a tourguide, as he now wants to show you around the Jahai Bluffs. Hey,
it's 2.5k EXP, so why the hell not. We can put up with one crazy guy for a bit for EXP, right? His first landmark is almost directly south of here (don't worry about him running off, this isn't
an escort quest. He'll be fine). After his story about how he bravely ran away from some harpies head SE for the next landmark. Supposedly, he killed a griffin with one arrow from a mile away.
Yeahsure, and I'm made of cheesecake. ... no, that was sarcasm, put that fork down. Head straight north to the other side of this area for him to claim that he bested a heket here with wrestling
moves he learned at the Shing Jea Monastery (which, if you've ever played Factions, you'd know was a big huge lie since the only non-Canthan who's ever been allowed to study at Shing Jea in the
history of humanity was Mhenlo from the Prophecies campaign). Well, one last place to go. Head east towards the fort you scouted with Nerashi earlier and talk to him for your quest reward, then
map to Pogahn Passage.
Take the northeast portal into the Dejarin Estate and head north (be sure to grab the heket bounty as there are a TON of frogs around here). When you reach the water follow the shore to the east,
then go left right before the triangular-shaped stone arch. Still in the water go left to the shore to the east and continue east past a mob of non-hostile, currently-irrelevant NPCs. Once you
crest the hill a short ways away proceed cautiously as there are numerous frog patrols all over this area and they wander all over the place so it's easy to end up fighting 3+ groups at once if
you're not careful. Continue east past the res shrine through the portal into Camp Hojanu. Switch Koss back in (blaaaah) and go out into the Barbarous Shore. In this area you'll see a new
type of heket called Blue Tongue Heket. These are rit healers so make them your priority target. Ignore your quest markers and head straight east to get a corsair bounty from the res shrine.
From here follow the road south to the split in the road. From there take the left path and follow it to the next shrine, then go left again. The path splits two more times after this, and take
the left path each time. The second one will take you down into a grassy area and you'll see Ruthless Sevad just ahead. As soon as you talk to him about the Foolhardy Father quest the other
corsairs become hostile so make whatever preparations you need to before that. After the corsairs are dead Sevad says Zudash's debt is settled. Talk to him about A Fool's Luck afterwards, and...
oh Koss why are you so goddamn stupid. ^=__=^;; He thought he was the one collecting 5k when it's actually whoever has the ticket is the one who owes Sevad 5k. That's nice. And since I'm a
cheap bastard choose to collect the other debt (the second dialogue option). Now, the arrow is misleading cause it seems like the guy you need is just up the road but in fact he's inside the
mountain. No, really, it's hollow. Just move a couple of paces south and you'll see what I mean. Go inside and follow the path to the right to find Jerob No-Spine, who says he doesn't have the
money but he knows where there's some loot stashed away. Why hasn't he acquired this loot for himself? Well, apparently there's some sort of monster guarding it. Continue following the path to
the south to end up back outside. Be careful here cause there are several bosses out here and tons of corsairs. You might want to pull a few back into the hollow mountain to avoid aggroing too
many corsairs at once. *Note: There's an unlocked chest near the beginning of this area on your left that contains a Preserved Red Iris Flower. If you have the GW:EN
expansion you might want to pick this up and keep it. If you don't have the expansion then this item is trash. Stick to the left side of this area and take the left path at the other
side (i.e., not the path going up towards the res shrine). When the path opens up cross the bridge on your left, then go around the little pond thing to get to the tiny island that the "monster"
is on... which appears to be just a Stoneflesh Mandragor, and also apparently happens to be owned by none other than Sevad himself. Once Sevad's little buddy is dead he drops "5k" (this isn't
actual money, it's just a quest item, which makes it the better option since if you'd chosen the first option earlier you would've actually paid him 5k out of your own cash), so apparently we are
paying Sevad back with his own ill-gotten gains. Hahaha, talk about karma. Well whatever, once you have the quest item return to Sevad. Yeah sure buddy, it totally worked out for you ^<__<^;;
enjoy your null gains. Heheheh. Anyway. Map back to the Sanctuary to get your reward from Lonai, then to Yohlon Haven to get your reward from Zudash. He's also got another quest for you, which
you should get but we're not doing it right now cause Zhed should be lv 20 by now and we're going to get another party member soon who's going to require levelling (thanks again, Anet). So!
Back to Kodonur we go.


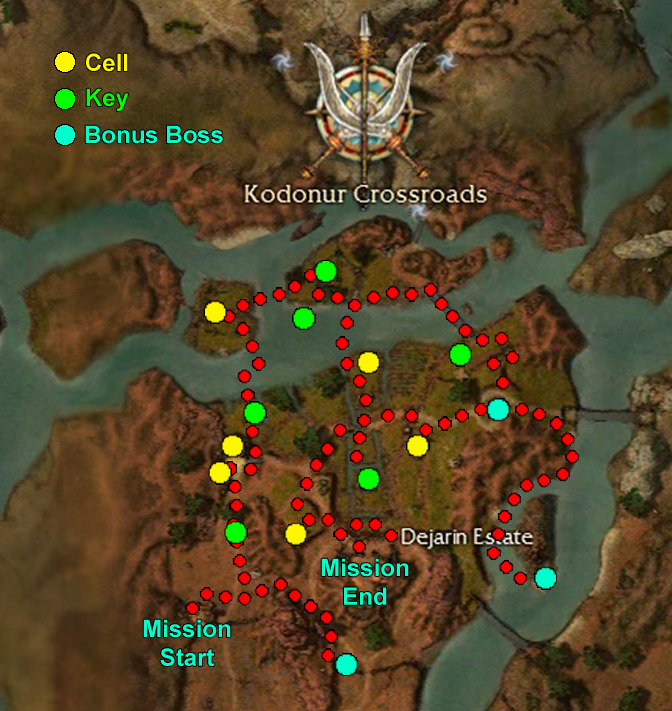
Required hero: Zhed Shadowhoof, The Crankiest Cranky-nonpants
Mission map here.
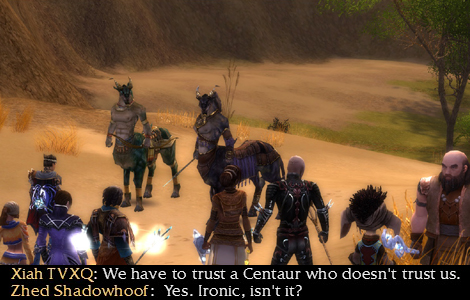
Talk to the guard guy again and tell him you're surrendering Sunspears to really make his day. You spawn inside a pen. After some bitching the guards wander off. Haroj shows up right after you
complain to Zhed, and sets you free. Alright so the mission wants you to free Mirza, the leader of the centaur pride. However, although the enemies at the end are pretty easy the game won't let
you rescue him until you've freed all the other centaurs. In order to do so you must kill Taskmasters to get keys. One key will only open one pen, after which it disappears (and you can use any
key for any pen). The bonus is to kill three extra bosses in the area but they're not really on the way. As usual I'll be assuming that we're all here for the bonus as well. The three bosses
aren't too far out of the way so it's not really a big deal to just do it. Anyway, here we go. There's a group of Kournans patrolling around on the road to your right. Wait by the inactive
res shrine there and take them out when they get close enough. Next, go east from the shrine and take out the group just ahead. When the path splits go right and ignore Zhed's bitching. The
first bonus boss is just ahead (Taskmaster Suli). Backtrack to the shrine (shutupZhed) and head north for the first key-holding taskmaster. As long as someone picks up the keys anyone in the
party can open the cell doors, just fyi. And no matter what Zhed says you can make all the noise you like~ Continue north and take out the group by the first group of cells. Inspect one of the
cell locks (hold down left Alt key) to open one of the cells and acquire a reinforcement. There's a bridge on your right. Go right before the bridge and then go left under the bridge then go
north for your second key group. Backtrack to the cells we just left and open the second one here, then come back to this spot and continue north. You should see another res shrine up ahead.
Go there and wait for the patrol to come to you and take them out, then kill the elites on the island. The next cell is on this island and the next key is in the mob just east of you in the water.
Free the centaur here and then continue to the island east of here (north of where the key mob was). This mob has your next key. From here head straight south to the round building that is the
next cell. Take out the two elites here and free the next centaur, then take out the patrol that wanders into the water NE of you, the second patrol that comes in from the res shrine to the NE
of here, and then return for the patrol that comes onto the island the latest cell was on. From here go directly south to find the next keyholder who may or may not be wandering around by himself.
There's a patrol headed your way from the south so take them out as well. Make your way back north again past the lastest cell to the res shrine. From here go right and take out the two elites
and cross the bridge for two more elites. Your next key group is just to the right of them. After that go east past the bridge you just crossed and go up the stairs on your right, then immediately
go right up onto a grassy hill. The next bonus boss is directly south of your current position. She's a monk though so this might take awhile depending on your party's damage output. She's also
got an elite scribe with her so be careful. Just east of you is a closed gate. Go to it and right before it go right down into the water. Follow the ledge in the water around and you'll soon
come across a rocky island. The last bonus boss is on the southern end of this island. Return to where the monk boss was and continue west. Take out the mob just north of the cell up ahead and
free the centaur. Go west down the stairs and across the bridge and take out the patrol on the other side then go south on the other side of the bridge. The last cell is just ahead. Free the
last centaur and take out the small group that has just materialised randomly out of nowhere behind you. Go back to this cell and go southeast a bit. Up ahead is a fort-type place with some steps
leading up to it just ahead of you. There's actually two sets of steps with a mob at the top of each. So what we want to do is take out this mob right here at the top of these stairs but stay
at the bottom of the stairs. After they are dead do not go up the stairs. Continue east and take out the mob at the top of the other set of stairs. Once they are dead go up the stairs, and mobs
materialise inside the fort out of nowhere. OK, here's the thing. You do not want to just run into the fort. Remember the Consulate Docks mission and how there were NPCs that would start throwing
interrupting siege attacks at you if you aggro'd them? Yeah, there's one of those inside. What you want to do is pull the first mob closest to the gate out of the fort and fight them there (the
gate blows open as soon as you get close enough). From here park yourself right on top of where the gate was and pull the second mob to you. The third mob might eventually get aggro'd cause of
this (your rampant murder triggering the third mob's monk to heal the second mob) but by this point there shouldn't be too many left in the second mob. The last mob has two bosses in it so be
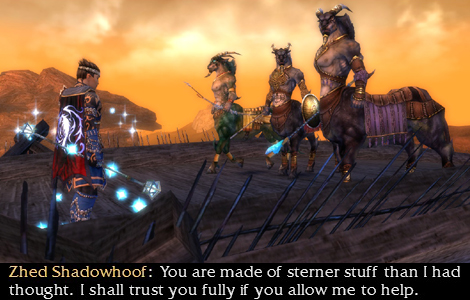
prepared, but they are just a para and a necro so it's not too bad. After they are dead, Zhed decides he's going to officially join us for good, even if he's still being a crankypants. Cranky
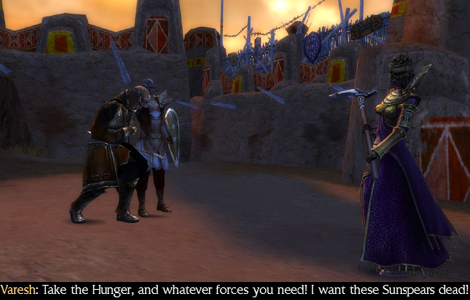
nonpants? Centaurs don't really wear pants... Varesh also seems to have a new pet whom she decides to feed her captain to for not killing us outright. She again demands that Bayel find and kill
us.
Quests: Mysterious Message (primary), The Tools of War, Eavesdropping, Weird Waters, Centaur Concerns, For a Price (primary, Margrid split), Secrets in the Shadow (primary, MoW
split)
Back at the Sanctuary, Lonai says some other strange thing showed up while we were gone. You know, if weird things keep showing up here maybe it's not as secret, safe, or hidden as we thought...
Head into the Command Post and talk to Dunkoro and Melonni, who have new quests for you. Afterwards, talk to Zhed about Dunkoro's quest and to get the first quest in a quest chain from him. Next,
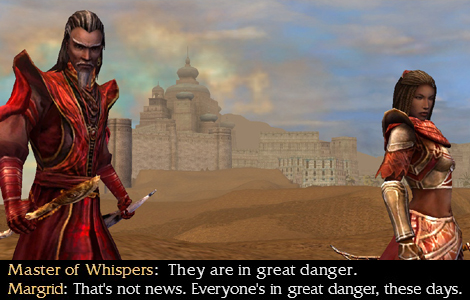
go out into Jahai Bluffs and head directly north of the res shrine just outside to some weird face statue thing. Margrid, the corsair chick who helped us during the Venta Cemetary mish, shows up
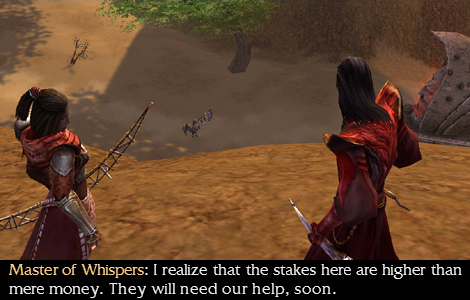
with that random dude Zhed was talking to before Kodonur. MoW (Master of Whispers takes too long to type) tells you that he's found a way to Vabbi around the giant fortress, however Margrid informs
us that Kormir is not, in fact, dead. Yet. So we have a choice to make. OK, so minor spoiler here: even if you choose not to save Kormir the game sends some of the other Sunspears to free her,
and if you choose to save Kormir you still end up in Vabbi eventually so in reality the choice you are making here is which of these two people are going to join your party and what your next
story mission is. After the next mission everyone ends up back together again anyway so yeah, this walkthrough is going to split you up for a bit. OK so now let me tell you about these two
potential party members. I mentioned this before when you were choosing between Sousuke and Jin, but whoever you don't pick now will be available to join your party after you finish the Nightfall
campaign so you can still get everyone. However, Margrid is a ranger and MoW is a necro, and I find necros to be a lot more useful. The choice is yours, but I will tell you that I find MoW's
story mission a lot easier than Margrid's. The demon he talks about is at the very end and can be very very strong however I know a trick to defeating him relatively easily. Everything else about
his mission is just more Kournans. Margrid's is also Kournans forever but you're rescuing Kormir so at some point the mission turns into an escort mission, which means if Kormir dies you have to
restart. And guess who hates escort missions~ I'll be writing up stuff for both of course but I'm just giving you a heads up as to what you are getting yourself into. Oh yes, and there's a primary
for each before their respective story missions. IF YOU ARE GOING FOR SURVIVOR TITLE CHOOSE MARGRID. Seriously, MoW's primary can be very very evil and you run a very
high risk of wiping, so choose wisely (unless you have a friend who will do it for you with their party of heroes/hench while you stand somewhere safe). Anyway, talk to Whispers Adept for your
quest reward, then talk to whichever NPC you want to have join you: MoW the necro for killing a demon and finding the secret route to Vabbi, or Margrid the ranger for saving Kormir. Margrid wants
you to find a map of Gandara for her (the fort we were in during the Consulate Docks mission), and MoW wants to test your skills. Neither of them will join your party until you get your quest
reward in their respective mission outposts because Anet seems to think getting a bunch of EXP before handing us lv 18 required heroes is a good idea. ^=__=^;; Also, the information for these
primaries will be in the first paragraph of their respective story missions on the next page (Pogahn Passage for Margrid, Rilohn Refuge for MoW).
Between a Rocky Demon and a Hard Fort
Corsair Infestation
Those Bird-Things Aren't the Only Harpies Around Here
It's Getting Kinda Crowded In Here
And Then the Men Go Marching Out Into the Fray...
Boldly Going to Strange New Lands
On the Run


