

Mission map. Just a short note: You cannot run to this mission. The only way to get here is by doing the Augury Rock mission,
which can only be done if you've done the other three desert missions. The Dragon's Lair mission leads directly to Droknar's Forge (the first city in
Prophecies where you can buy max armour), and is the only way to get there unless you either got run from Beacon's Perch earlier, or fought there from
Beacon's.
You start off in a very small area that's not marked on my map, but you won;t be here longer than like five seconds after your entire party loads so it
doesn't really matter. Talk to the snakeman in front of you (don't worry, this one isn't hostile), who tells you that if you want to talk
to Glint, you're going to have to defeat her six facets. Basically, this mission has six different sections (not counting this starting area), each themed
to one profession in that at the end of each section is a boss of that profession that you have to defeat in order to continue (the bosses are marked with
a crosshair on my map). Also, each different section has a different quirk of sorts. I'll cover each one in its appropriate section. Also, make sure
you bring at least one cap sig, as each boss here has an elite skill you've not seen yet (unless you cheated and went to another campaign at some point).
And since defeating each boss spawns the portal into the next area, make sure you inform your party beforehand if you wish to capture a certain elite
skill so that they know to wait until you've capped your skill before going through the portal. Once the Forgotten Gate Keeper stops talking, a portal
opens behind him. Step through to enter the first section (and yes, you'll get a cinematic of your party going through the portal after every section.
Don't bother skipping though, as not only are they incredibly short and usually over before your entire party even gets to hit the Skip button, but the
very last cinematic is rather important, if you've not seen it before).
Section: Monk
Quirk: Party-wide constant HP degen
Elite Skill: Shield of Regeneration
The first section is the monk section. As posted above, the quirk for this section is that your entire party suffers constant -3 HP degeneration. Good
healing skills to bring for countering this quirk are Heal Party (monk healing prayers) or Life (ritualist restoration spirit), or Heal Area (monk healing
prayers) if you can somehow manage to get your entire party to cluster around you every once in awhile to hit them all in one Heal Area. Another healing
strategy for this section is to bring lots of low energy cost healing spells like Ethereal Light (monk healing), Mend Body and Soul (ritualist resto),
and Orison of Healing (monk healing) and just randomly spam those at people. They work a lot better if you happen to have the elite skill Healer's Boon,
but that's a Nightfall elite and it's not mandatory anyway.
This section is rather short, thankfully. Move forward and go up the short rise on the left. Defeat the solitary Sage, then move back down and forwards
to take care of the two Enchanted down there. Go back up the rise and continue forwards and left, and aggro the group down below you (let them come to
you). Stay up here and continue onwards, taking out the Sage and again letting the group below come to you. Since the group below is melee, they'll have
to go around to get to you, and the Sage should be long dead by then. Continue along the top ledge and banzai the next mobs, since you can't pull the Sage
as the land blocks your shots. Stop here for a sec and regen, then head down the hill to the frozen lake thing. Take out the individual Sages that patrol
along the sides of the lake, then the melee Enchanted in the middle. Pull the last group of Enchanted away from the boss that you'll now be able to see
to the south, kill them, then attack the boss. The boss is a monk, and thus squishy and also thus pretty easy to kill, despite its elite. Once the boss
is dead, cap its skill if you wish, then go through the portal into the next section.
Section: Ranger
Quirk: Party-wide slower movement speed
Elite Skill: Melandru's Resilience
So... yeah. The quirk here is hardly noticeable, really, cept in the areas where you're not fighting anything, so it's really not that
bad. Wait for the group of melee fighters to come as close to you as they do, then pull them towards you. After that, attack the group on the ledge on
your left. Sometimes they decide to come down to you, so let them. Be aware that there's another melee patrol that moves towards you from the south.
Another melee group should show up pretty soon from the east, so let them come to you and kill them off. Continue east (you can avoid the group on the
ledge to your right if you hug the left wall), then head south where the path splits. Let the patrol come to you, then go for the group on the ledge.
Continue forwards, then right into another lake-ish area. Wait for the running patrol to run down the beach towards you and attack them. There's another
running patrol in this area which you might end up also aggroing while fighting the first one. Once both patrols are dead, move on to the boss at the east
end of the lake. This boss is also pretty easy, so just kill it.
Section: Mesmer
Quirk: Maze-like section
Elite Skill: Mantra of Recall
In this area, there's no real quirk except the headache-inducing layout. Be very very careful of the Chaos Storm spam around here, and the Crystal Spiders
are just plain evil. You get attacked by a group of spiders right after you load. They like to spam Shatter Enchantment, so use enchants sparingly around
them. I highly suggest killing off the Illusionists on either side of you before moving forward, just realise that no line-of-sight skills will work because
they're behind a barrier. There is a way to get to them, but you'll end up aggroing other things if you go that way. Just use skills like Deathly Swarm
or other non-line-of-sight spells to kill them. Move on to the group of spiders, then the next group to the southeast, and remember to regen when you
need to. Kill off the last mob of spiders to the east and follow that path into another lake area. This lake, however, is set up like a maze. But have
no fear, the webmaster is here! Hug the right wall and go around til you find the first break in the maze on your left. Attack the group to your left (not
the one to the south yet) and remember to watch out for Chaos Storm spam. If you stick to the left maze wall (when facing this group), you should avoid
aggroing other groups. Now hit the group to the south, then turn east and kill the group there. Continue east through the maze, then north, then take
the break in the maze to your left and try not to aggro the group to the north. Go all the way west and destroy those two groups there, then go north to
find the next break in the maze, and continue on to the boss and her little group of Illusionists. Kill off the Illusionists first, as they're the ones
with the damaging spells, then concentrate on the boss. The boss has a skill called Diversion that causes the recharge of the first skill you use while
this hex is on you to have like almost a minute more of recharge added on to its regular recharge time, but the hex itself only lasts for six seconds, so
if you see Diversion on you, don't cast anything til it goes away. Next?
Section: Necromancer
Quirk: Death Nova on every living thing in the area (allies and enemies)
Elite Skill: Grenth's Balance
As soon as you load, you'll notice some weird green swirly stuff around everybody. This is a necromancer skill called Death Nova, except that the one
here does not expire until you leave this section. Basically, every time something alive dies, it explodes and causes damage and poison to all of its
adjacent foes. This quirk also applies to any enemies in the area, so try not to get too close to any enemies unless you absolutely have to (i.e., you're
melee). The plus side is that any minion master in your party now becomes a minion bomber (sploding minions), and there are plenty of corpses in this
section. Anyway. Move east and take out the mob there, and... well, this section is pretty straightforward, so just regen when you need to and meet me
at the lake area (and no, I don't know why there are a bunch of dead Ascalonians around here). Kill off the scarabs at the beginning of the lake area,
then hug the left wall and head north. Take out the Cursebearers on the way, then continue along the left wall to find another group of two Cursebearers
off to the side by themselves. Kill them, then head right to find the boss and not even bother with the other enemies on the lake. Healers, keep your
eye on your party, because this boss has an elite skill that will literally cut random party members' HP's in half. Other than that, just don't all get
too close to him unless you're melee and she's pretty easy to kill.
Section: Elementalist
Quirk: Wards that cast Eruption, Fire Storm, Maelstrom, and Chain Lightning at anything standing in them
Elite Skill: Lightning Surge
The quirk here is that some patches of ground look like they have wards on them. These wards will cast powerful elemental magic at you, like Maelstrom
and Firestorm, amoung others. So... if you see wards, don't go into them while fighting, and run through them if you have to get through them. WATCH OUT
FOR CRYSTAL GUARDIANS!! They also have very powerful spells and can wipe a party if you're not careful. How lucky, the first mob in this section is
made up of Crystal Guardians... yey... ^-__-^;; Continue on, and right before the next group you'll see one of those wards I just mentioned. Pull the
next group through the ward towards you so you don't have to fight in the ward. When the ward looks relatively calm, run through. Two Arcanists now come
at you from the left, so make sure you've regened before running through the ward. Continue west, run through the ward, and be careful as there's a group
of Guardians here AND a group of Arcanists that rush you as you approach. Move north through another ward, then stop here to regen. While you're waiting,
two of the Arcanists up ahead will rush towards you. The other two will wait there until you cross the next ward. Once at the lake, pull the Guardians
towards you, then run down the beach on the right to avoid all of the wards. The Arcanists are in the same mob as the boss, so don't bother trying to pull
them away. Kill the Arcanists first cause the boss is cake unless you decide to stand right next to her.
Section: Warrior
Quirk: Party-wide KD (knock-down) every 20-ish seconds
Elite Skill: Gladiator's Defense
Last section! Woo! As mentioned above, the quirk here involves a party-wide KD (knock-down) every 20 seconds or so. Alright, go right up the hill and keep
to the right. Wait for the KD just before aggroing the group here, then keep sticking to the right wall (don't go across the bridge) and pull the group
down below towards you. Don't even bother with the mob of crystal stuff and just continue right. You can also avoid this next mob of crystal things and
turn right. Follow the path into the lake area, then keep right again to avoid yet another mob of crystal evilness. A group of melee Enchanted will run
towards you, so kill them off and continue on to the back to the last melee group (they're not with the boss). After they're dead, wait for the KD, then
kill the boss who is also incredibly easy. Go through the portal, and remember that this cinematic actually has more to it than just you going through
the portal.
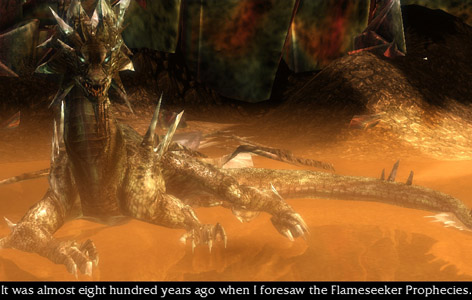
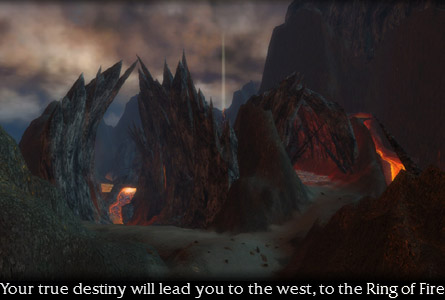
WAUGH, GIANT DRAGON! Glint shows you what's been going on in the world while you've been traipsing about the desert, and also tells you the truth about
Markis, the White Mantle, and the Mursaat. And tells you that you have to go to the Ring of Fire. Well... if you're not interested in the bonus, the
mission will end when you go through the portal she opened behind you (if you just map out, the mission will not count as complete and you won't be able
to go to Droknar's Forge). If you do want the bonus... it involves killing Glint. ^T__T^ Look to your right and you'll see some dragon eggs. I highly
suggest making any preparations (like setting down traps, healing minions, dropping spirits, whatever) before picking up the egg, cause she'll immediately
become hostile after you pick one up. By the way, don't worry if she wipes your entire party, as you'll get another cinematic where Glint gets all grumpy,
resurrects you all, and sends you on your way through the portal (you automatically go through during the cinematic), so you won't have to start over again
to get credit for the mission. I just beat her in NM with H/H, so it's not that impossible, although she is the toughest enemy in the game, regardless
of campaign (in my opinion, anyway). Basically the only things you have to remember are 1) Stay the hell away from her cause not only does she hit hard,
but Jagged Crystal Skin can kill you very very easily, and 2) Have something to interrupt Crystal Hibernation with or else this will either take forever
or you won't be able to kill her at all. Once you've killed her (you've left her children without a mother, you big meanie!), go through the portal to
finish the mission. If you just map out, the mission will not count as completed, so... yeah. Go. through. the. portal.
I Never Thought I Would Go Back to the Shiverpeaks. You'd Think I'd Remember to Pack Cold Weather Gear
There's Something Looming on the Horizon
Everything Went [BOOM]
Of Princes and Kings and Banishings
I've Got Snow in My Boots
Corpsicle Alert!
From Snow to Sand in 2.5 Seconds
Of Lions and Lambs
White Mantle, Coast to Coast
In the Jungle, the Deadly Jungle
The Shining Blade's Labyrinth
Fear and Loathing in Maguuma
Ascension Contention
I Don't Think Desert Makes a Very Good Dessert

