

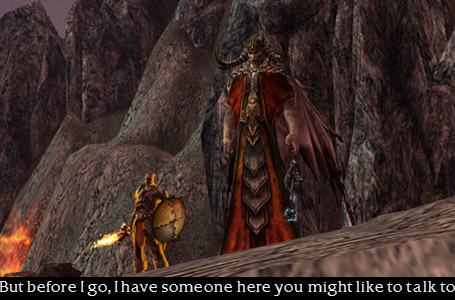
Haha, this outpost is the same area where you fought the last boss in the last mission, with the bridge's gate closed. There's some dude here named Blade
Warrior Olivio who'll give you some random info about this infamous Door we keep hearing about, but you don't need to talk to him if you don't care. Also,
if you plan on doing the bonus for this mission, bring some cap sigs along, cause the area where the bonus is has a lot of the rarer elites in Prophecies.
Anyway.
Mission map. Make sure everyone's loaded and ready before moving, cause as soon as the path veers south, Vizier Khilbron
shows up and gives you this really nice buff: 50% faster skill recharge, 50% less energy cost, and 50% faster movement speed. Continue west to find some
giant fort thing (the Onyx Gate thing Olivio mentioned if you talked to him, which isn't so much a gate but a REALLY BIG FORT. Seriously, it's a lot
bigger on the inside). Ignore the entrance for now (don't aggro the Seal), and pull the Jades in front of the fort away from the door. Kill them, then go
all the way left along the fort wall (be careful, as the lava pools out here will set you on fire if you step in or near them) and take out the mob up top
just like you did during the Thunderhead Keep mission. Do the same on the right side as well (there's another mob further right that you can get from down
here as well). Once the mobs up top are dead, regen, then destroy the Seal. Be ready to run back east after the Seal is destroyed in case the mobs inside
rush down.
Once inside, take out any mobs that are nearby on either side of this entrance, then go east, then southwest and take out the mob on your left (yeah, you
can get up to where they are, just check your radar to see the way up). Continue southwest then west and take out the Jade Armours there. Go north (left
of the steps going down) and take out the mobs along this path. Ignore the mobs down below, even if you aggro, then head back south. Do not stay there
and fight the stuff down there! You'll get to them later if you're doing the bonus, but whether you want bonus or not, don't kill them yet. Anyway, back
on the south side of the area, wait for the patrolling group of Mursaat to come up the steps to your right (not the big ones we passed earlier). Ignore the
bosses for now and go west from the big stairs I keep telling you to ignore. Pull the Jades away from the Seal, then attack the Seal. This will aggro the
bosses down below, so go take care of at least one of the bosses. The other will probably run back down, so go finish destroying the Seal at this point.
You'll end up reaggroing the second boss, but it's better to fight the bosses up here than down below, trust me. After that, head down below, kill off the
Jades, and go up the steps on the other side. Here, it's kinda hard to pull the Jades away from the Seal, but if you can, grats. Either way, kill them
all! :op Go back down and regen, then head through the gate you just opened (by killing the Seals). Head through, and the Vizier gives you another buff.
Follow the path, then continue southwest and kill the two groups of Jades along the way. Here, you'll see some Jades further southwest, and a bunch of
hydra and flesh golems on your right. This is where you get to decide if you're doing the bonus or not. If you're not, skip the next paragraph.
OK, bonus! Kill all of those hydra and flesh golems, then stop at the edge of the lava pool. A mob of flesh golems and a mob of hydra run around just
beyond the lava pool. You'll want to pull both mobs across the lava to your party (but not both at once please). Once they are dead, cross the lava pool.
Go northwest-ish along the shore and kill everything you come across, then head southwest when you can and follow this path, killing anything within about
two aggro circles of this path. When the path splits, take the left one and... huh... trees? ^O__o^ Well, continue along the path past the insanity tree
and... um... find yet another Eidolon. I am sick of you, giant red squid-thing! Well, stop right before the bridge and pull him across, cause you don't
need him being annoying while you're doing what you're about to do. Cross the bridge and... AAAHHH EARTHQUAKE! (this may not happen right away, but trust
me, it will at some point) Start attacking crag behemoths, all of the ones nearby. You don't need to go down the creepy-face-lined path to the south
unless you either a) really want the elite Snyk the Hundred Tongue has, or b) want to take the essence the stupid Eidolon dropped to the seer who is further
down that path somewhere. Do run all over this islandish area around here and kill off any wurms that pop up (again, you don't have to go down the south
path), including all the way up the hill where there's actually grass and flowers growing. Run all over that hill and make sure there is nothing left there
to pop up later. Once you know for a fact that there are no popups left, return to the fort, specifically to those big steps going down that I kept telling
you to ignore earlier. Go down them, follow the path, and kill EVERYTHING (everything down here, anyway). Once you destroy the second Seal down here (on
the docks), a ghost appears. Talk to her to start the bonus. She starts running whether you've spoken to her or not. Now, this is why I had you kill
everything past that lava pool first (well, most everything). See, even though Leah here is dead, and is a ghost, just like some of the other ghosts we've
dealt with so far in this campaign, she too can die. And if she dies, no bonus for you. Also, while technically she should be able to get to her resting
place by herself from here, at least follow her to the lava pool and make sure she doesn't die from the lava. If you're not following her all the way, go
ahead and continue on with the rest of the mission, as the bonus will complete once she reaches the grassy part of that hill we boggled at earlier.
Head towards those Jades, destroy the Seal, then stop right at the gate. Wait for the Mursaat Monk to run off to the south, then pull the bosses to the
gate, because if that monk is healing the bosses it can become a real pain in the arse, especially if you have the monk boss as well. Go inside, kill the
monk, the Jades, and destroy the Seal. Once inside, you'll find another gate guarded by a Seal, but do what you did in the beginning and take out the mobs
up top first (both sides). Take out the Jades inside to the east and head across the weird glowing bridge and... are those... souls... making up this bridge??
... creepy... Don't worry about the statues just up ahead, as nothing jumps out of them. Take the right path around the pool so you have an easier time
of pulling the bosses away from the Seal, kill the bosses, destroy the Seal, then continue through the gate. Follow the path to get another buff from the
Vizier. We are ALMOST done.
OK, this is how this works. There are six Seals that you need to destroy to open this Door of Komalie thing everyone wants opened. However, each time you
destroy a Seal, several lv10 ghosts spawn from the Seal. Now, OK, lv 10 isn't that bad, but if you destroy more than one Seal at once, more ghosts will
spawn, and several at once can become a real pain in the arse. Plus, on top of that, every time you destroy a seal, some Mursaat will come from either the
path you used to get here, or the path on the other side of this area (east-ish) to attack you. So this is what you do. You have your entire party target
one of the Seals closest to your side of this area. ONLY ONE. Yes, I am aware that minions will not follow target calls, but don't worry about that, just
worry about your party. Once a seal is destroyed, retreat a bit down the path halfway between where the Vizier is and where the Seals are and let the ghosts
come to you. Also keep an eye out for the Mursaat that will come for you (the ones that come from your side will pretty much spawn right on top of you,
but at least you'll know that they're there this way). There's usually two that spawn on each side, but not at the same time, so be aware of that too. Once
that's done, continue to the next closest Seal, and so on and so forth, until all the Seals are destroyed. Once you've cleared one side of Seals, feel free
to move your party down below, but be aware that there's a huge lava pool on the southwest side that will light you on fire if you get close enough. Once
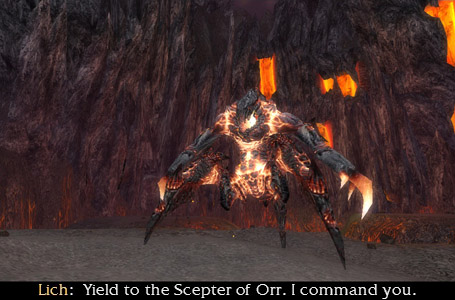
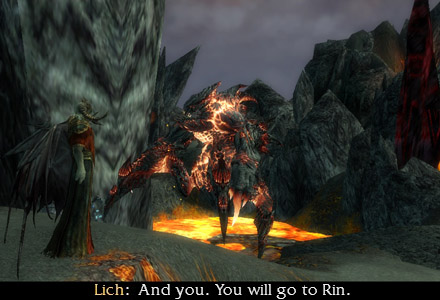
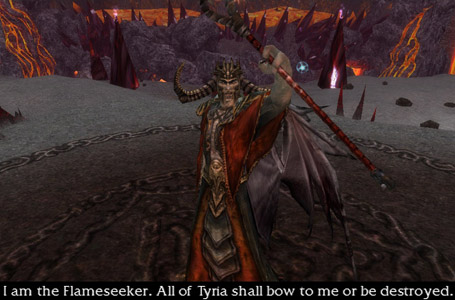
the last Seal is destroyed, you get a cinematic. Um... what the heck is that? Oh... oh crap... Well then. Heyyy... Anet cut out one of the Lich's lines
in that cinematic. He says "Kill them" and points to you! I dunno when they took that out or why but I totally remember him saying that. Anyway. Once that
cinematic is over, you're left to deal with what apparently is called a Titan. Don't worry, this one's a pushover. He goes down quite easily, and another
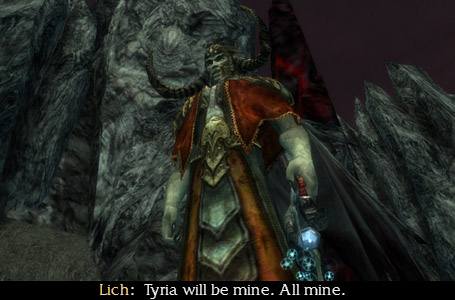
cinematic starts, in which the Lich sends his army (that we helped him get, by the way) to go conquer the entire world. Oh boy...

Right off the bat I'm going to tell you that, no matter what, you NEED to take the skill Winter on this mission. You don't have to take a primary ranger,
as long as someone takes this skill and keeps it up at all times. Winter, for those unfamiliar with it, is a ranger nature spirit (Wilderness Survival)
that changes all elemental damage to cold damage. This also means that you can take a fire ele with you and still do damage to these Titan things, which
are immune to fire in case you didn't catch that from the fact that they're born from lava. Anyway.
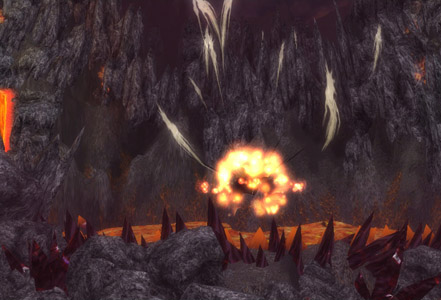
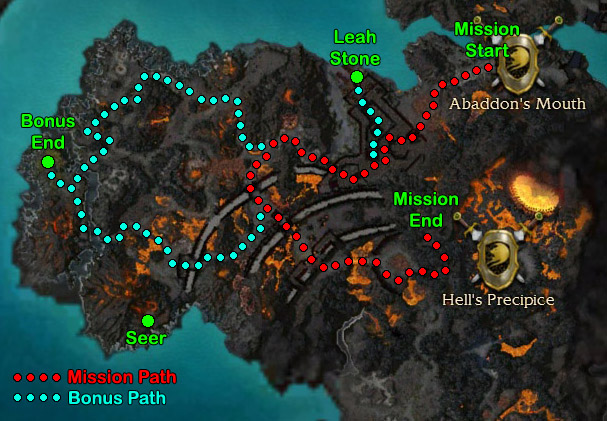
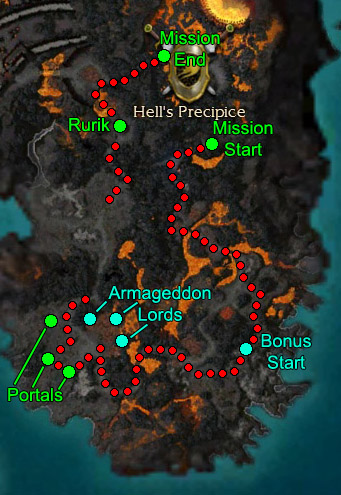
Mission map. One thing that you should know is that randomly rocks will fall from the sky and act like as if someone cast the
Meteor spell on you. Nobody is actually casting this and it doesn't happen with any great frequency, but if it does happen I'm just letting you know what
it is. Basically, you're on a bloody volcano so it randomly spits out rocks in random directions. Moving on... Head forwards and stop on the bridge. You'll
see some titans up ahead. Now, there are three basic types of titans. The first type are the huge Burning Titans. They're large and attack kinda slowly,
but once they die, however, they spawn a Risen Ash Hulk. This happens every time a Burning Titan dies. Risen Ash Hulks are the second basic type of titan,
and sometimes exist without having spawned from a Burning Titan. They are necros and use minions. When they die, they spawn two of the third basic type
of titan, which have either Hand or Fist in the name. They have a lot less HP than the other basic types, but act like rabid warriors in that they only
use physicals, they hit hard, and they hit fast. You NEED to concentrate on one Titan at a time, and whenever you kill one, wait for his spawns to pop and
kill them first instead of aggroing some other titan, because if you kill two Risen Ash Hulks at once you're gonna have four rabid warriors attacing you and
trust me, this is NOT a good idea.
Follow the path south to find the Lich, but don't bother attacking him as he quickly disappears and some titans show up to attack you. Turn left as soon
as you can and stop on the bridge you see a short way in front of you. You'll see some Sparks of the Titans up ahead. These guys really suck cause they
enjoy spamming powerful fire spells. Continue east and take out the Sparks first (they are all one mob so don't bother pulling). Follow the path, and stop
where the path splits. You must do some very careful pulling here otherwise you're gonna wipe your entire party. When you're ready, continue south and do
some more careful pulling. Yeah, it's one huge giant mob. Target the Sparks first, and don't be afraid to run away if you need to. After the giant mob
is dead, RUN further down the path and stop the titan down there from killing the Seer. Well, unless you don't want to do the bonus, but the bonus is on
the mission path anyway so it's not obnoxious or anything. Anyway. Talk to her once the titan is dead to initiate the bonus.
Head west when you can (there's a small break in the ground where there's a tree on your right that you can go through so you don't have to fight the huge
giant mob. The Lich shows up to taunt you again and leaves just as quickly. The Sparks are their own mob this time, so pull them first, then continue west,
then south across the bridge. Follow the path, kill the mob by the trees, then stop by the second tree. Regen here, and now someone needs to start pulling
nearby enemies this way (don't pull the Armageddon Lords). The other reason why you're parking here is because more things will spawn for the next, I dunno,
ten minutes or so from the lava where the Armageddon Lords are and it's better not to get caught between them and other enemies, especially since sometimes
bosses spawn from there too. You can actually pull everything in this open area (except the Portal Wraiths) all the way back to where your party is parked.
Just don't pull everything at once, of course. Now, if you want to do the bonus, the spawns from the lava pools should be done spawning by now. Go ahead
and pull the Armageddon Lords to your party, one at a time. Note that they are exactly like Burning Titans with the spawning of lesser titans thing, and
they're eles, so be careful. But they're not too difficult. Also, only the closest one will pull that far, so just go ahead and go to them (but don't
step in the lava, duh). Once the last Armageddon Lord is dead (regardless of his spawns) the bonus is complete. Now you must close the three portals (the
glowing turquoise globes on the west side of this area), which requires you to kill the Portal Wraiths to do so. Be careful, as these guys are powerful
eles. You can pull them away from eachother one at a time if you're skilled enough at pulling. Once all of the portals are destroyed, a cinematic starts.
The Lich laughs at you some more, and rubs in the fact that we're the ones responsible for him having this titan army. And then... ack, holy crap! Zombie
Rurik! If skipped the cinematic, you should be in a safe spot. If you watched it, you'll be right at the base of the hill Rurik's on, right smack dab within
aggro range of EVERYTHING. So... as soon as the cinematic ends, RUN THE HELL BACK. Hopefully only a few of the titans followed you back, so get rid of
them. Regardless, pull the closest mob of titans, then pull Rurik towards you (the Sparks will come too). Once Rurik and the Sparks are dead (sounds like
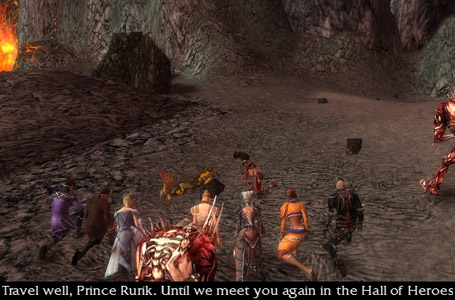
the name of a really bad band), another cinematic plays, regardless of whether you killed the other mob of titans or not. Rurik asks you two favours: to
kill the Lich and close the door, and to kill him too to end his misery. You willingly oblige (hahaha, I've always wanted to kill Rurik :op ), and a
bridge rises out of the lava as the cinematic ends. And yeah, the titans have disappeared, even if you didn't kill them all.
Cross the bridge to find more of those Mursaat statue things, but these don't spawn anything either. Kill the titans running around the lava pool (unless
they run off), then follow the path east. Heyyy, isn't this the same place where we finished the last mission? (yes, yes it is) Fortunately, there are no
Ether Seals hanging about this time. Kill off any titans you see, then approach the bloodstone. The Lich is on the other side, but will approach the bloodstone
when you do. You can ignore any other titans on the other side for now. I just want to stress something Rurik said during the cinematic: You NEED to kill
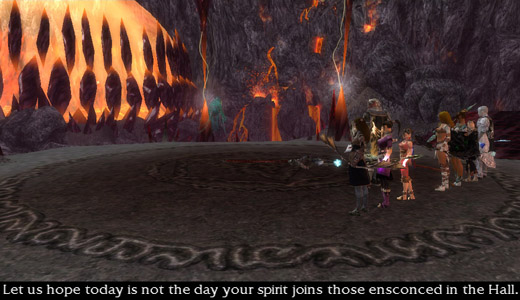
the Lich on the bloodstone. This isn't just a stupid plot gimmick for the same of being dramatic. If you kill the Lich when he's not on the bloodstone
(including teetering on the very edge of the bloodstone), HE WILL RESPAWN. This is ANNOYING. You have to kill him on the dark grey circle in the middle.
It doesn't have to be right smack dab in the middle of the grey circle, as long as he's in the dark grey part. Another side note about the Lich: he has a
unique-to-him monster skill called Soul Vortex. If this spell hits a party member, it will teleport that party member into the giant lava pool, which is
not only disorienting, but sets you on fire. If this happens to you, click on anyone in your party list and hit spacebar so your character automatically
takes the fastest route out of the lava pool (unless that party member also got teleported into the lava, which only happens rarely). However, if you manage
to still have minions at this point (usually with the Aura of the Lich elite which you can capture in this mission), this spell of his will always target
a minion (unless you run out of them), which is quite useful.
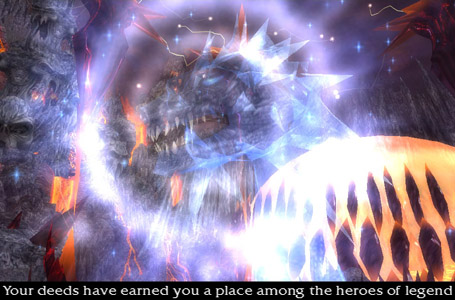
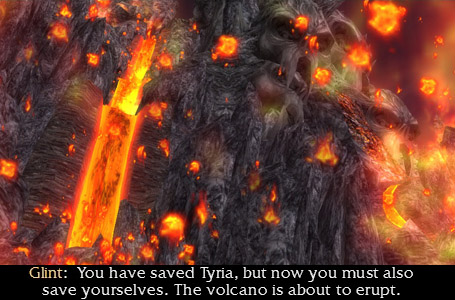
Once the Lich dies on the bloodstone, the ending cinematic plays, in which a spectre of Glint appears, congratulates you, says that the titans have once again
been sealed behind the Door, and then tells you the volcano's about to explode and you should probably leave so you don't become crispy critters. I highly
suggest watching this entire cinematic, as after the cinematic ends you will load in a special area of Droknar's Forge that you can only reach by watching
this cinematic (so if you close your game before getting here, you're kinda screwed. Especially since it's not a map dot on your world map). Once here,
all of the important living NPCs in the campaign are here, congratulating you and having random conversations that are sometimes somewhat amusing. However,
that's not why I said you should watch the cinematic. Talk to King Jalis to acquire a special item called a Deldrimor Talisman. You can now trade this
item to any of the Artisan NPCs behind King Jalis to receive a free unique (green) max weapon or offhand.
AUGH, WHY AM I STILL TALKING?? Well yeah, OK sure, we just finished the last mission, but there's still a few last notes and other things you can do that
belong to the storyline. One thing I'd like to note is that by completing the Prophecies campaign you've just unlocked Hard Mode for the Prophecies campaign
(check the FAQ for more info on Hard Mode (a.k.a., HM)). The second thing is, remember how the Lich sent out a bunch of titans "To Lion's Arch! To Thunderhead
Keep! And you, you will go to Rin!"? Yeahhhhhhh... those titans are still out there. Head to Droknar's Forge (the one that's actually on your world map)
so we can actually do something about them. There's also the Sorrow's Furnace stuff to do too, which we'll do last.
Tying Up Loose Ends
There's Something Looming on the Horizon
Everything Went [BOOM]
Of Princes and Kings and Banishings
I've Got Snow in My Boots
Corpsicle Alert!
From Snow to Sand in 2.5 Seconds
Of Lions and Lambs
White Mantle, Coast to Coast
In the Jungle, the Deadly Jungle
The Shining Blade's Labyrinth
Fear and Loathing in Maguuma
Ascension Contention
I Don't Think Desert Makes a Very Good Dessert
Do Not Meddle in the Affairs of Dragons, For Thou Art Crunchy And Taste Good With Ketchup
I Never Thought I Would Go Back to the Shiverpeaks. You'd Think I'd Remember to Pack Cold Weather Gear
Infusions and Invasions
These Are Not Hot Springs

