


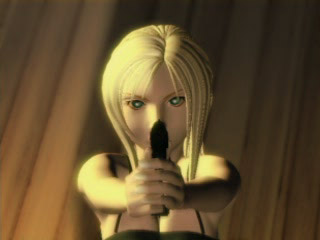
As soon as you load, you see a blonde guy standing outside of a limo, and a blonde chick sitting inside the limo. Bad news: You're the chick. Choose
whatever name you want, but I'm still gonna call you Aya. :op Anyway, Aya Brea is an NYPD police officer, although apparently she's new to the force
(you'll find this out within the next 10min so it's not a spoiler, shush :op ). Another "apparently" is that she only agreed to this date with this
nameless rich dude because he wouldn't leave her alone until she went out with him. Well, here you are, on a date with some guy who doesn't even get a
name, on Christmas Eve at Carnegie Hall to see an opera. Even though the game lets you run about out here outside Carnegie Hall, there's nothing to find,
so just go inside. In the entrance room there isn't anything to do or find either, so just open the doors (if you talk to your date, he makes a comment
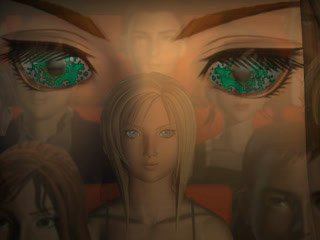
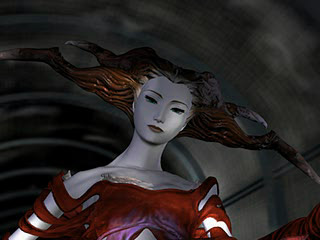
about how the first act's already started). Once inside, you sit down to watch the opera, which quickly goes to hell. As soon as the main actress starts singing
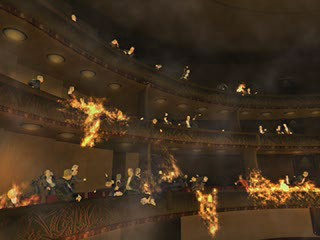
her solo, she looks into your eyes and everyone starts bursting into flame. Once the chaos dies down, you pull out your gun to find that only you, your
expendable date, and the main actress are the only people in the hall that haven't died from not-so-spontaneous combustion. By the way, get used to that
heartbeat-like sound, because from now on most of the times you trigger a battle, you'll hear that sound first. Get rid of The Nameless Wonder with a hilarious
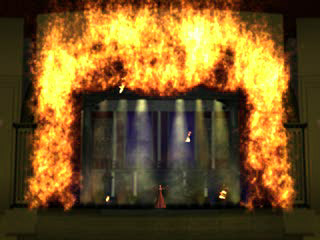
shove and approach the stage (no, there aren't any items strewn about, so just climb the stairs and approach the actress). Somehow, the actress has the
ability to sing opera and have a conversation at the same time. ^O__o^;; She says something about you "awakening" soon, and then attacks.
 Boss: Eve
HP: 40
Attacks: Energy shot
EXP: 0
Recommended level: 1
My current level: 1
Boss: Eve
HP: 40
Attacks: Energy shot
EXP: 0
Recommended level: 1
My current level: 1
First off, let me explain the difference between "Recommended level" and "My current level." Basically, I never used to put levels in my walkthroughs
because I idiotically assumed that everyone either played the same way I did, or that everyone followed my walkthroughs from page one (which is a ridiculous
notion, but hey, I was new at this). Then a friend suggested I add levels into my walkthroughs, so here they are. Basically, "Recommended level" is the
level I feel you should be at to beat whatever boss it's listed under. "My current level," however, since I tend to not level up much, is usually the
minimum level you should be at in order to beat the boss (and as I replay the game more and more, that number tends to go down).
So, on to the actual boss battle. When she's got little glowing green lights around her, that means she's charging up her attack. You'll notice you've
got a blue bar up in the top left-hand corner above your HP that has AT (attack) to the right of it. When this bar fills up and starts flashing you can
actually attack. Just run around until your bar fills up, then get in close to shoot at the actress (the closer you are, the more damage you do). After
one shot (from a close enough range) and the actress starts talking again. If you didn't do enough damage with the one shot, just keep running back and
forth across the screen so you can dodge her energy shot. Aya comments about her body getting hot, and is surrounded by glowing orange lights. After you
protest about what the actress has done to you, the battle starts up again, so go back to running back and forth until your AT gauge fills up again, then
run in close for another two shots (I'd suggest running in after the actress has gotten off another energy shot, so you don't get hit).
After a couple more shots, she'll start talking to you again. She calls herself Eve, and says your bodies are trying to communicate with eachother. She
also claims you'll soon become more like her when you use your "power," and you get a short vision of a little girl in a hospital. Eve laughs and exits
stage left. There's nothing onstage that you need, so follow her left. In this next area you'll see a grey crate on the right-hand side. These crates
(they generally come in grey or brown) are really useful cause 1) they have items in them, and 2) you can store stuff in them. Yey! This one's got a
Medicine 1 (I'll just abbreviate those as Med 1's from now on because I'm lazy). Approach the hole to hear sirens approaching, which is your backup. Go
ahead and choose "Forget it" for now and head out into the street (you'll need to go in front of the stage curtains to get down from the stage, otherwise
you'll just end up at the giant hole in the floor again). Dodge the burnt bodies in the entrance hall (nothing on them) and step outside to have your
backup aim guns at you. Yeah guys, I feel the love here... ^-__-^;; You show your badge (... did you seriously have your badge hidden in your bra??) and
everything's cool. Talk to the ambulance dude for his speculations on spontaneous combustion and to get some free healing (if you didn't need it, oh well).
Talk to the cop furthest on the right for some free bullets (he'll give you six each time you talk to him, yay! Well, until he runs out, anyway... which is
after he gives you 60) then go back to the giant hole.
Now that we're here, I'll give you a quick how-to explanation (you need to reload your gun anyway, so listen up). A more detailed how-to will be in the
How to Play section linked at the top of this and every other walkthrough page. Anyway. Hit

to open your menu. I'll go
from the bottom up. Arrange Items (SORT) lets you move stuff around in your inventory (comes in handy later on), Set User Preferences (SYS) lets you, well,
change user preferences ( ^<__<^;; ), Change Armour (jacket icon) lets you switch armour), Change Weapon (gun icon) lets you switch weapons (you'll see
you currently have a handgun and a club. The club is for if you run out of bullets, which is BAD, cause who wants to go through the game like as if its a
glorified version of Whack-a-Mole?), Use P.E. (PE) is for when you get "magic" later on (actually, "Parasite Energy," and you'll notice you've got one
right now but it's greyed out), and Use Item (which seems to be some sort of box icon). Go into Use Icon and find your Ammo Crate, press

and choose Reload, then press the down arrow until your gun is fully reloaded (six bullets for now), then press
again. You'll want
to do this often, otherwise you'll waste valuable time during a fight trying to reload your weapon and getting whacked in the face by enemies. ^>__<^
This is also where you can use your Med's when you need to.
Anyway, back to the game! Jump down into the hole and... hey, it's that girl from the vision! Hey, come back here! Well, if you need to get back up, you
can use the left side of the screen (there's a ladder of sorts there, even if you can't see it). Head forwards to find yourself in a hallway. Most of the
doors here are locked so just move down the hallway til you get into the next section and... ohhhh crap. ^.__.^;; Well, here's your first real fight of
the game (in that it's the first fight that actually gets you EXP and has an enemy that you can kill). Watch out, cause these things shoot fireballs from
their tails (three at once), so run around like you did with Eve until you get your AT gauge full, then shoot it. Rats also drop ammo, so they're
useful for replenishing your stock if you need to. Aya then pretty much goes O__o;; and you regain control of her. Enter the door on the right to find
a... clown?? My turn to go ^O__o^;; He thinks you're there to rob him, and has no clue that everything was just on fire a minute ago. He says some prophetic
last words to you, runs out the door, and you hear a scream... ^-__-^;; Unfortunately, you can't steal the money he had on the counter, but you can pillage
the lockers in the back for some ammo (who keeps bullets in an opera dressing room??). Leave the room and enter the left room to find some dead people.
Raid the lockers in the back for one of the bodies to twitch. ^.__.^;; Go talk to it to get some info on "Eve," and for her to die in your arms. Well,
only thing you can do now is raid the rest of the lockers! :oD! There's a Med 1 in one of them. Leave, and continue down the hall to the last door on the
left. As soon as you try to move further into the room (or try to touch the desk), the body there falls to the floor, and you scream like a girl. Check
the body for a key (unlocks most of the doors down here), then go behind the half-wall next to the desk to find a chest up against the side wall. It
contains another Med 1. If you inspect the coats, a parrot will come screeching out, screaming "Hot! Hot!" Sometimes this parrot will turn into an enemy,
but not always (even if you inspect the coats), so do whatever you want. The other important thing in this room is the telephone. Telephones in this game
are save points (or SP's in my lazy abbreviation language), and you can save at any phone as many times as you want.
When you're done with that room, head back into the hallway and start unlocking doors. Go to the middle one on the left first and open the closet in the
back for some ammo. Walk up to the table and read the diary to get some insight into Eve, for Aya to speculate about Melissa being a drug addict, and to
get another key. Back in the hallway, go across the hall to the door on the right. If you talk to the bird in here, it'll tell you "Merry Christmas!"
and then promptly mutate and attack you. So... ignore it unless you want the EXP. They drop Med 1's too, so... meh. They like to fly in sporadic circles
and attack you, so try to dodge as best you can, but they also die pretty easily. The closet in the back has more ammo. Back out in the hallway head back
towards the giant hole, only to be stopped by that heartbeat noise I told you about. Oh look, more rats. ^-__-^;; I suggest immediately running between
them towards the back, at which point your AT gauge should be full. Pump the nearest one full of lead! :op (be careful, cause they can also scratch you
if you get too close) Now, these rats won't appear EVERY time you try to move between the two hallway sections (take that, modern MMO anti-farming scripts!),
but there's a random chance they will, so do what you want with that information. Anyway. Enter the door on the right (nearest the split between the hallway
sections) to find yourself backstage. Go towards the front of the screen to get attacked by two rats and a parrot. Take the parrot out first, since the
rats are easier to dodge, and remember that closer shots equal more damage. Another thing to note is that when you level up, only your max HP goes up,
not your current HP, so even if you haven't gotten hit by anything yet, you might still wanna heal at some point soon (plus, you're probably almost out of
space for items by now anyway). At the very bottom of the screen on the left is a crate with some ammo or a Med1 in it. Exit through the double doors you just passed
to find the body of the clown. Inspecting him will get you a bit of mourning from Aya but no items, so whatev. Go through the door on the left in the
hallway to find another crate on the left. Open it to get an Offense +1, which I suggest not using til you get your next gun, unless you really need the
space. Sometimes it's a Defense +1 instead, which you should wait to use cause you're about to get new armour.
There's a closet in here that is not only annoyingly difficult to open because of its angle, but only contains a rat that jumps out at you and then
instantly mutates. In these cramped quarters, the EXP you get from this lone closet raider isn't worth the trouble, so just don't bother with the closet.
The last thing in this room is hidden. Go to the back wall on the side where the crate is and inspect it for it to fall down. Inspect it again for Aya
to crawl through. There's another chest back here with better armour for you, so put it on already. I highly suggest tossing your old armour into a crate
cause you're gonna need the inventory space (just inspect the crate again and choose Yes). Go back into the hallway and enter the double doors at the very
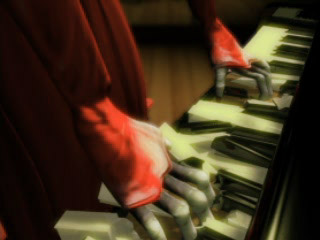
back (make sure you've healed and reloaded first!). You can save before that if you want. You find Eve playing the piano on the other side of the doors.
Go talk to her! I'm sure she's friendly! Cept for the apparent case of confused identity... She babbles on about nuclei and then gets mad at her own
confusion and takes it out on the poor piano. And... turns... into... something... strange... Um... didn't she say something earlier about us becoming like
her? I want to keep my legs!! ^T__T^ She declares that mitochondria will have their day, then decides she doesn't like you anymore.
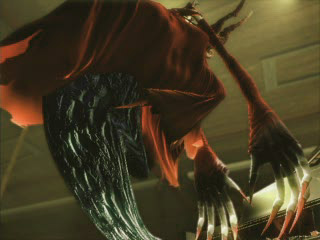
 Boss: Eve (part deux)
HP: 100
Attacks: Dual energy beams, scratching
EXP: 0
Recommended level: 3
My current level: 2
Boss: Eve (part deux)
HP: 100
Attacks: Dual energy beams, scratching
EXP: 0
Recommended level: 3
My current level: 2
This fight's a bit harder than the last one vs Eve, since she's suddenly taken to flying about the room. The best way to avoid her energy beams this time
around is to actually stand still. Well, until after she casts them. See, the thing is, if you stand still, they originally miss you completely, but then
go somewhat slowly in one direction or other. Lightly tapping the analog stick in whatever direction they're moving in should cause you to avoid them
completely (or only get hit once for some rather minor damage). Don't get too close to the crazy lady with the insanity hair, though, cause she also hurts
you if you touch her, and she can also do some pretty hefty damage with those piano-pwning claws of hers.
After awhile, Eve gets bored of being shot at and talks about freedom for mitochondria again. She must be the head of some wacky radical cult. You get
another vision of the girl in the hospital, who gets a visit from some doctor that you seem to recognise. Once you come back from dreamland, Eve is gone.
Check behind the piano though, and you'll soon see that she didn't just vanish into thin air. Jump in (unless you wanna save first, but there's another
save point coming up pretty soon) to find yourself in... a sewer. Ewwwww... Well, go forwards to get attacked by... well, what else are you gonna get
attacked by in a sewer? Man, they weren't kidding when they said that New York sewer rats were huge... ^@__@^;; Best thing to do in this fight is run back
between the two rats there while your AT gauge fills. You know what to do from here. Continue on back for... oh hey... so I was wrong about what else you'd
find down here. GIANT MUTANT FROGS!! These guys can lick you from very far away (about 1.5 body lengths of theirs) and do damage, but that's about it.
I still suggest killing the frog before the rats though, since again, rats are easier to dodge. They have higher phys resistance than rats, though, so
keep that in mind. There's a crate right next to the left staircase with a new gun for you in it. I suggest using that Offense +1 you got awhile back on
this gun, if you haven't already used it. Going upstairs isn't the best idea ever, unless you really want EXP. The only thing you'll find up there is a
pretty complicated battle (because of the layout) with two rats at the very back, so do what you want (you don't always get to fight them, but if you
really want to and they don't show up when you get to the back, just go to the previous screen and then back again to get the fight). Sometimes those
rats drop Revives, so that's a plus.
On the lower level, head towards the back to find out what that weird noise you've been hearing is (that little girl crying). She runs off. Again. Very
helpful. Ignore the door she opened for now and go to the back. In both back corners are crates (Offense +1 on the right and some
more ammo on the left). And yes, I know, those two now-useless keys are getting annoying, but unfortunately the game won't let you get rid of them yet.
Blargle. Also on the right side, just before the crate, go further right to end up in a hidden area with some crates in it (Cure-P, Range +2, and an
Offense +1). Go to the door the kid went through. Just before you go through it, between the door and the stairs going up, is another crate with a Med1
in it. Now, go through the door to battle more mutant frogs. Now that you've got your new gun,
you'll notice that you have three shots per turn instead of two. You won't always need three shots to kill something though, and choosing to use more bullets
than it takes to kill an enemy wastes valuable time. So... if you only need two shots to kill, say, a rat, and you're fighting a rat and something else,
you can choose to use two bullets on the rat and then use the analog stick to switch to another target to allocate the last bullet for that round to shooting
them. Yay! Now, kill those frogs already! ^>__<^ On the left-hand side on the wall in the back is a switch and a phone. Hit the switch, then SAVE!
Once on the other side, you locate Eve again. Run up to her to spike a sudden fever, and for Eve to make more vague, confusing statements, after which she promptly
buggers off again... by melting through the sewer grate bars. She does leave behind a friend for you to play with, however...
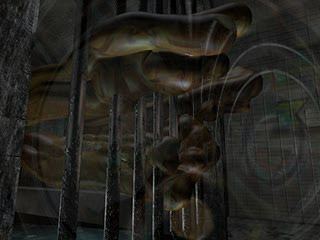
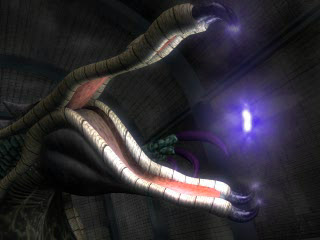
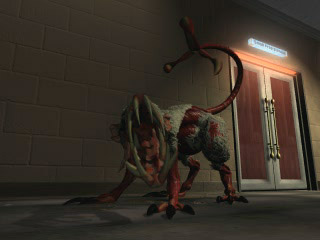
 Boss: Taser Gator
HP: Tail: 80, Body: 120
Attacks: Energy waves from tail (5), fire blasts from his mouth (3), scratching, whacking you with his tail
EXP: 30
Recommended level: 5
My current level: 5
Boss: Taser Gator
HP: Tail: 80, Body: 120
Attacks: Energy waves from tail (5), fire blasts from his mouth (3), scratching, whacking you with his tail
EXP: 30
Recommended level: 5
My current level: 5
As the game so conveniently informs you (hey! That's
my job!), there are two targets: the gator's head, and his tail. Take out his tail
first, because those energy waves his tail does are annoying to dodge, especially since there are five of them and tend to cover the entire screen.
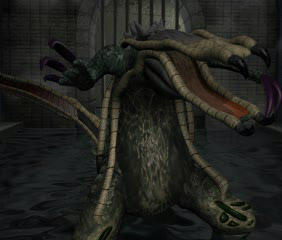
Once the tail is "dead," the gator pauses, the screen goes black for a bit, and the camera angle switches. Now all you've got to worry about are the
fireballs he shoots out of his mouth, three at a time (what happened to the electricity from the FMV?? I guess he figured water conducts electricity and
he might end up turning himself into alligator gumbo...). It doesn't take too many more shots for Mr. Gator to go the way of the dinosaurs.
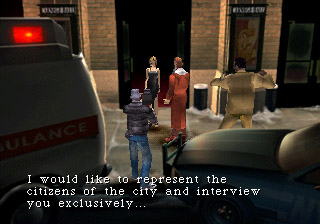
You get a nifty vest from this fight, and also a temper tantrum from Aya. You walk outside and get mobbed by a nosy reporter, who promptly gets KO'd by
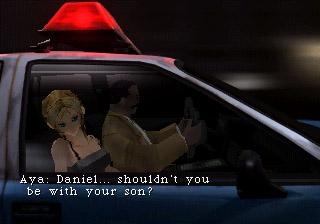
Daniel, a fellow NYPD cop. He takes you back to the station while ragging on you about your wussy date. You quickly deflect the topic onto the subject
of Daniel's family, but Daniel's too smart for that, and switches the topic right back. You soon fall asleep to avoid having to listen to him further.
We get a short cutscene of a flyby of New York City that does a lot of foreshadowing, and the day ends.

Fun Time at the Zoo (Day Two: Fusion)