From the House of Salvation, go southeast, then cross the bridge and follow the path to the very end. Raine tells Colette to offer the
map up at the altar. And no, sorry, the dog there in the courtyard refuses to be named, cause he's already got a name (the dude near him
is his owner). Bad dog, no cookie! ^>__<^ By the way, go all the way left and open the chest behind that guy there for 1,800g. *wonders why that guy
didn't take it...* ^<__<^;; At the altar, part of the stone opens up, and Colette puts the map in. An oracle stone appears, Colette puts her hand on it,
and the back wall opens up. Go right, defeat the monster, uncover the SP if you really want to, although you could just go outside to save, and open the
chest at the bottom of the screen for a Beast Fang. Examine the right wall, but it's too dark to see. Try lighting that torch next to you, and the
wind blows it out immediately. Well, fine.
Back at the entrance, take the first path up, then go up the steps, and left (WALK, don't run across the metal part with holes in it. If you run, you'll
be impaled by the floorspikes). Light the torch all the way to the left and examine the wall next to it. ... oddish. Anyway. Go down and left for
another torch, then examine that wall as well. Push the block down onto the lower level, then go down the steps and defeat the worm thing there for a
Memory Gem. Move the block you dropped onto the one already in the floor to turn off the wind, then go back to the thing you couldn't read earlier.
Remember, walk slowly across the metal part on the right so as to not get HP taken off. Light the torch again, and examine the wall. Save (either here
or outside, doesn't really matter), then take the path right next to the one you took first.
Stand right before the wallspikes, then as soon as they start to pull back, run forward, then stop before the next one. The last one goes a tad faster,
but you can still make it. The torch in the back can't be lit yet cause of the wind, so go left and up the steps. Go north and read the wall, then go
right and light the two torches to reveal a path. Before going inside, though, go right and down the stairs and read the wall. Go left from there and
examine the glowing blue thing to change the Sorcerer's Ring. Anyway. Change the Ring back, then go south from the stairs and move the block right and
onto the other one in the floor to stop the wind. Open the two chests in the back for an Iron Guard and a Blue Ribbon. Go south from the block, light
the torch, read the wall, then open the chest to get a Beast Hide. Return to the torch that you couldn't light earlier, read the wall, then come back to
the path you opened, change the Sorcerer's Ring, then enter the path.
Sheena apparently has arrived at the Balacruf Mausoleum, but again is stopped by Noishe. Yay Noishe! Oh, wait, no, Noishe is afraid of
Corrine... hahaha... what, it's just a little blue-tailed kitsunechan... (Corrine: *CHOMP*) ... AUGH!
^X__x^;; Anyway, this is another puzzle. If you were paying attention earlier, then you already know the answer:
-
Clue: Ruby left hand throne of gods, emerald right hand power of gods, pearl white left leg calm earth, topaz right
leg rich earth, lapis lazuli body blue wind princess (sorry, that's not the whole thing, but the important bits are there).
-
First combination: That which blue wind princess protects heads from the throne of gods and across the rich earth, stands
upon the calm earth, and gazes up at the power of gods
-
Fan order: Blue, red, yellow, white, green
- Treasure chest: Blue Ribbon
Second combination: That which is offered to the throne of gods, from the power of gods makes the rich earth as the calm
earth and arrives at the blue wind princess. This be as if traveling the giant's body in the manner of a clock's hand
-
Fan order: Red, green, yellow, white, blue
- Treasure chest: EX Gem Lv. 2
Third combination: The holy seal that extols the king flows from the throne of the gods to the rich earth, travels from the
power of gods to the calm earth, and when the blue wind princess is born in the center of the world, the holy seal shall be complete.
-
Fan order: Red, yellow, green, white, blue
The door in the back is now open. I suggest healing now. Like, really... When yer ready, go through the door...
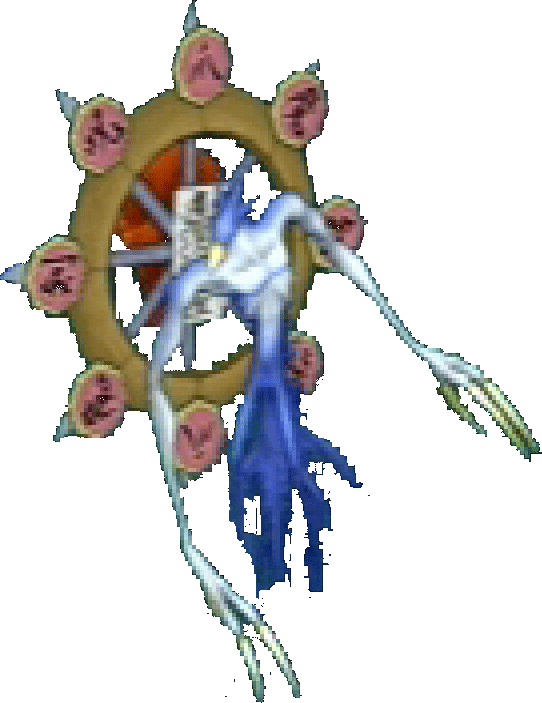
 Boss: Iapyx
HP: 14,000
TP: 88
Strengths: Wind, Lightning
Weaknesses: n/a
Attacks: Air Thrust, physicals
My current level: 22
Tempest does nothing whatsoever in this fight. As usual, have Colette casting Angel Feathers. Make sure that Kratos and Genis do NOT
cast anything wind or lightning-related, although having Lightning in your U Attack actually works fine. Lloyd should use Tiger Blade a
lot, and Genis should be casting Stalagmite. Let Kratos just heal people.
Heeeeeere's Remiel! [/psychoness] ... so how come she doesn't get a new tech after every seal? Bah. *shakes fist at Remiel* Oh, wait,
she got one this time. Aha... ^<__<^;; OK, avoid as many enemies as you can while leaving, cause once you reach the door to leave the Mausoleum...

 Boss: Sheena; Lightning Guardian
HP: 4,500; 5,500
TP: 164; 400
Weaknesses:
Attacks:
My current level: 23
Again, go after Sheena first. Land a bunch of physical attacks on her and a couple of Lightnings, then use Sonic Sword Rain or Beast to
knock her back and away from the Guardian. Now, use a U Attack, and shortly after that she should be gone. Go after the Guardian now,
again using Tempest frequently. Genis can cast Air Thrust and Colette does Angel Feathers, of course. This fight is a lot easier than
the last time you fought Sheena...
After the battle, Sheena becomes quite confusing. So... if we save Sylvarant... some other world that Sheena's from will be destroyed?
... my brain hurts. Well, leave and stuff, and Colette, as usual, collapses. Apparently, she's bleeding. ... and can no longer feel
anything. Awww, how cute... and slightly depressing. Anyway!
Head to Luin. Upon your arrival, you discover that the town's been destroyed. Use the top path to get to the second area, and you find
Sheena in the same place she was in before. She's apparently been wounded, and Raine says that she'll heal her on one condition: Sheena
has to tell them what happened to Luin. Apparently, the Desians invaded and destroyed everything. Oh look, Clara's back. Didn't I tell
you people that you should be just a tad more worried about that thing wandering around?! ^>__<^! It attacks Sheena and Colette, then
magically disappears to go wreak havoc on other people. Raine finally heals Sheena, who asks you to help her save the people of Luin.
Agree, grommit! DESTROY THE RANCH! (What, another one?) Yes, another one. DESTROY THEM ALL, AHAHAHAHAAAA!! ... *ahem* Sheena joined yer party!
Talk to the guy by the fountain twice to learn that Clara stole the key to the Tower of Mana from him. Huh... seems that we'll have to
go Clara-hunting later. Beh. Augh, Corrine talks! (skit, sorry...) Anyway. Head to the Asgard Human Ranch!
This place is in a forest to the northeast of Luin. Huh... apparently the defense around here is pretty high. Um... disguising themselves
as Desians? Wouldn't that only work for Genis and Raine, since they have the ears? Ambush! After defeating them, the party returns to Luin.
Suddenly, it's nighttime again... heh. Haha, Lloyd wants to play dress-up. Haha, he wanted to wear a girl's uniform... *snickers*
Anyway, the next morning, Raine and Sheena bring you all in as prisoners. Once inside, go to the right. Navigate your way through the
boxes to the chest to get a Beast Hide. Now, head to the very back and enter the base. Enter the control room, which is the door on the
left in the back, and the party is now out of their Desian clothes. Apparently, the Asgard Human Ranch is used to manufacture Exspheres.
Fun. Huh? What next room? ... Botta?! Ack! ... not Desians? I'M SO LOST!! Soooo... many... emoticon... ballooooons..... ^@__@^;; Ack,
more Desians! Botta and co. flee in terror, and Kvar makes an appearance. ... Botta's a renegade? *groans* Renegades, Angelus Project,
mutant cheesecake... makes my brain ache. Hahaha, Kvar's scared of a little girly chakram.
Anyway. Open the chest in the back for a White Robe, then go down the stairs and beat up the Desian wandering around. Keep going, beat
up the other guy, and go left. SP! Go left some more and up, then take a left and go down. Killing off the Desian there gets you a
Memory Gem, and the chest contains an Iron Bracelet. Go up the stairs in the back to notice a bunch of humans on a conveyer belt behind
a large window. ... um... wait, what? ... man... this is like in Chrono Trigger if you do that Mother Brain sidequest and find out that
tabs are made from humans... *geck* Yggdrasill? What a name... wait... uh oh... looks like Lloyd's about to go berserker... his father?
Looks like history kinda repeats itself, huh? Ohhhhh, so that's how Sheena pulls her disappearing act. Eh? Back to Luin? Again? *sigh*
Back and forth, back and forth... well, you heard them. To Luin!
Huh, now everybody but Colette has an Exsphere. ... woah, Lloyd's pissed. Well, agree, cause you ain't gonna get anywhere without that thing.
Well, besides six feet under, that is... anyway. The next morning, go right from the fountain and towards where that old lady that Colette
confused used to be. Talk to the person there to find out that somebody escaped from the ranch and is now in Hima, and that the person
probably knows a secret about the ranch. Back in the first area of Luin, talk to the guy there who's apparently a survivor of the Luin
disaster. This triggers another training session with Kratos. Anyway. Try leaving Luin, and your party discusses what to do next. Raine
reminds you of the guy that other person was just talking about, and apparently Sheena knows him. Well, OK, time to find Pietro!
West of Luin is a bridge. Cross it, then go north for a chest with a Technical Ring in it, and a Map Skit (you'll have to pull back to
get onto the beach and reach it). Cept... remember that skull monster back in the Ossa Trail mines? Well, if you want to, you can go fight
it now; after all, we are pretty close to the Ossa Trail... From the Map Skit, turn around and just keep following the beach til
the end, then go up onto the grasslands and cross the bridge. From there, just go straight south and you'll reach the Trail. Ifyer not
gonna fight the skull guy, skip to the next paragraph. Anyway. He's in the same place he was in before (although you might want to rest
up in Izoold first). OK, your party for this fight should be: Lloyd (duh), Colette, Genis, and Raine. Now, usually when we fight tall
enemies, I have you using Tempest, but unfortunately that pretty much does nothing here. Have Lloyd do Tiger Blade continuously, and have
Genis casting Stalagmite. The Sword Dancer is weak against light, hence having Colette and Raine in your party. Colette's Angel Feathers
and Raine's Photon do a lot of damage to this guy, so use those often, but make sure you watch Lloyd's HP. Use Lemon Gels if his HP drops
below 800 or so, because the Sword Dancer does A TON of damage. He'll usually just go after Lloyd, so if Lloyd gets killed, be sure to
revive him quickly so that the Sword Dancer doesn't come after the spell-casters. After the fight, you get the Yata Mirror. You can also
replenish your stock of Apple Gels, Life Bottles, and/or Lemon Gels by playing the EB game in Izoold. To return to where we were before,
just follow the coastline back.
OK, locate the path, and just keep following it til the end (yes, it breaks off once, but it continues on for a little bit after the break).
There's another little break and another little bit of path. At the end of that bit, go southeast towards that thing that looks kinda
like a brown wall. That's Hima. First off, though, go south, then east and around these mountains. Off in the distance, you should see
another Map Skit circle. Whenyer done, enter Hima (you have to go up the "wall" a bit to enter).
Enter the Inn and talk to the woman on the stairs. She recognizes Sheena... and apparently Pietro's dead. ... ^-__-^;; Go up the ramp
behind the Inn to approach the graveyard. Colette says they all should pray, and while you're doing that, some random guy (not .com)
shows up. ... who's... apparently... Pietro... ......???? What is with zombie-dude? Ah, well, OK, so we have to heal him now. Eh, fine.
But Clara took the key, ya know... anyway. OK, remember that huge-ass boulder we passed when we left the Asgard Human Ranch? Yep. That's
the one. You dig up his "grave" and get the Desian Orb. Well, anyway, go up even further in Hima for a scene. So yes, later on there
will be dragons. Fun, no? ... no? Eh. Well, anyway, time to destroy ranch number three!
Asgard Human Ranch
Angelic Awakening
Fire, Mutants, and Jail, Oh My!
Breaking the Fire Seal
To Palmacosta and Beyond, and Back Again
Breaking the Water Seal


 Boss: Iapyx